ChefCrown
The 13 Best Non Toxic Cookware Sets
Did you know that the cookware you use can affect not only the taste of your food but also your health?
The market is filled with non toxic cookware sets. Finding ones that offer healthier cooking without losing quality can be tough.
If you want to upgrade your kitchen with the best non toxic cookware, we’ve got you covered.
We’ll show you the top picks that are safe, perform well, and look great.
Non toxic cookware is no longer just for a few. It’s now a big deal. Old cookware with harmful chemicals is being replaced by safer, new options.
Whether you’re a pro chef or love cooking at home, knowing about this change is important.
It’s not just about the food, but also the tools you use to make it.
Let’s explore this new world of cooking, and find the thirteen best non toxic cookware sets that make cooking safer and healthier.

Top 13 Non-Toxic Cookware Sets Ranking Table
Here’s a quick comparison of the 13 best non-toxic cookware sets, ranked by durability, safety, and performance.
This table will help you see at a glance which options might be best for you.
| Rank | Cookware Brand/Set | Material | Key Features | Price Range | Reason for Ranking |
|---|---|---|---|---|---|
| 1 | GreenPan Valencia Pro | Ceramic with Thermolon | Diamond-infused, high heat safe | $100-$250 | Innovative Thermolon coating, ideal for high-heat cooking and durability. |
| 2 | Caraway Cookware Set | Ceramic non-stick | Sloped sides, notched handles | $395 | Stylish and functional, with non-toxic ceramic and standout aesthetics. |
| 3 | Xtrema 100% Pure Ceramic | 100% Ceramic | Extreme heat resistance, no heavy metals | Varies | 100% ceramic, with no risk of leaching metals or chemicals, perfect for health-conscious cooks. |
| 4 | Our Place Always Pan | Ceramic non-stick | Multi-functional, space-saving design | $145 | Multi-functional and compact, popular for small kitchens and versatile cooking. |
| 5 | Made In Cookware | Stainless Steel | Professional quality, durable | $100-$200 | Durable, professional-grade stainless steel, excellent heat distribution. |
| 6 | Le Creuset Enameled Cast Iron | Enameled Cast Iron | Oven-safe, long-lasting | $150-$400 | Classic brand for high-quality, non-toxic enameled cookware with excellent heat retention. |
| 7 | Lodge Cast Iron (Uncoated) | Cast Iron | Affordable, versatile, durable | $20-$50 | Traditional cast iron without coatings, popular for affordability and longevity. |
| 8 | Cuisinart GreenGourmet | Ceramic non-stick | Eco-friendly, PFOA-free | $100-$150 | Environmentally friendly, budget-friendly, and made without harmful coatings. |
| 9 | Scanpan CTX | Ceramic non-stick | Induction-compatible, durable | $200-$699 | Danish-made with non-toxic ceramic coating and compatibility with induction. |
| 10 | Solidteknics AUS-ION | Carbon Steel | Sustainable, naturally non-stick | $120-$150 | Unique carbon steel construction, naturally non-stick and extremely durable. |
| 11 | Zwilling Spirit Ceramic | Ceramic non-stick | PTFE- and PFOA-free, even heating | $100-$200 | German engineering with ceramic non-stick coating, highly reliable. |
| 12 | Great Jones Ceramic Cookware | Ceramic non-stick | Fun colors, high-quality non-stick | $80-$120 | High-quality, colorful ceramic coating that’s non-toxic and stylish for modern kitchens. |
| 13 | Calphalon Premier Stainless Steel | Stainless Steel | Heavy-duty, oven-safe | $150-$300 | Heavy-duty stainless steel, ideal for those seeking durability and versatility. |
Note: Prices are approximate and may vary based on retailers and ongoing promotions.
Understanding Non Toxic Cookware Materials
Key Takeaways
- Learn why non toxic pans and sets are a critical upgrade for both your kitchen and your well-being.
- Discover the GreenPan Valencia Pro Series and its high-temperature safe, diamond-infused Thermolon coating.
- Unpack the design and functionality that make the Caraway Cookware Set a stylish addition to modern kitchens.
- Explore the benefits of the 100% pure ceramic composition of Xtrema cookware and its potential for healthy cooking.
- Find out the implications of using cookware with or without PFOA and PFAS, and why labels can be misleading.
- Consider the environmental impact of non toxic cookware choices, including sustainability and pollution concerns.
Understanding Non Toxic Cookware Materials
When you look at cookware, the choice of materials matters a lot. It affects your food’s taste, quality, health, and the planet.
Traditional nonstick coatings like PTFE and PFOA are harmful.
So, moving to non toxic cookware is now more important than ever.
Why Choose Non Toxic Pans and Sets
Opting for non toxic pans means your food won’t be tainted with harmful chemicals.
Unlike old nonstick pans, these new ones are safer.
They’re made from ceramic cookware and stainless steel cookware, which are safe and can handle high heat.
The Shift from Traditional to Nontoxic Cookware
In the last ten years, people have started to prefer nontoxic cookware more.
This change is because of a growing need for safe products.
New technologies have made it possible to have nonstick surfaces without using harmful chemicals.
Materials to Look for: Ceramic, Stainless Steel, and More
When looking for safe cookware, focus on ceramic cookware and stainless steel cookware.
Ceramic, especially with Thermolon, is great for nonstick without the dangers of old coatings.
Brands like GreenPan are leaders in this field, offering safe and effective cookware.
Stainless steel, on the other hand, is durable and safe, keeping your food free from harmful substances.
Don’t forget about other materials like cast iron, glass, and untreated metals.
Each has its own benefits and suits different cooking needs and styles.
Top Non Toxic Cookware Brands Reviewed
Looking into safe cooking, the GreenPan Valencia Pro series stands out.
It has a special Thermolon coating that can handle high heat and metal utensils.
This makes it unique, priced between $100-$250.
The Caraway cookware set is also a great pick. It costs $395 for a 12-piece set.
It has sloped sides and notched handles for easy use and looks good in the kitchen.
GreenPan Valencia Pro Series
The GreenPan Valencia Pro has a Thermolon ceramic coating.
It’s made for heat conductivity and safe high-heat cooking.
This eco-friendly option ensures a non-stick surface for tough cooking tasks.
Caraway Cookware Set
Caraway cookware sets offer luxury and practicality.
They come with pots and pans coated with a non-toxic ceramic.
This ensures a durable, non-stick cooking experience with modern designs.
Xtrema 100% Pure Ceramic Cookware
Xtrema 100% pure ceramic cookware is known for its pure taste.
It’s extremely resistant to high temperatures and doesn’t leach heavy metals.
This makes it a top choice for health-conscious cooks.

Switching to non toxic cookware brands like GreenPan Valencia Pro, Caraway, and Xtrema can change your cooking and health. These brands offer safety and style.
They make sure your investment in healthier cooking also improves your kitchen’s look and function.
| Brand | Material | Key Features | Price Range |
|---|---|---|---|
| GreenPan Valencia Pro | Ceramic with Thermolon | Diamond-infused, safe for high temperatures and metal utensils | $100-$250 |
| Caraway Cookware Set | Ceramic non-stick | Functional aesthetics, sloped sides, notched handles | $395 |
| Xtrema 100% Pure Ceramic | 100% Ceramic | Extreme heat resistance, no heavy metal leaching | Varies |
Choosing any of these leading non toxic cookware brands is more than a culinary choice.
It’s a commitment to a healthier lifestyle.
It combines innovation and tradition in your daily cooking.
Non Toxic Cookware for Every Kitchen
Looking into non toxic cookware shows us many options.
These sets fit both professional chefs and home cooks.
They come in various sizes and designs, perfect for any kitchen, big or small.
From Professional Chefs to Home Cooks
Professional chefs need high-performance cookware.
The GreenPan Valencia Pro Series is a top choice.
Made from ceramic with a special coating, it handles high heat well and keeps food safe.
These sets also look great, thanks to designs like Caraway’s.
They mix style with function, perfect for any kitchen.
Sets That Fit Both Small and Large Kitchens
Home cooks with small kitchens will love Xtrema’s 100% pure ceramic cookware.
It can handle extreme temperatures, ideal for many cooking tasks.
Designs like SwingLock™ stainless steel handles are also a plus.
They fold up, saving space in tight areas.
Even the tiniest kitchens can look professional with these sets.

| Feature | Benefit |
|---|---|
| Diamond-infused Thermolon Coating | Provides durability against utensils and high temperatures. |
| SwingLock™ Handles | Maximizes space in small kitchen areas with foldable handles. |
| 100% Ceramic | Supports diverse cooking methods without leaching chemicals. |
| Non Toxic Materials | Ensures safe cooking, free from PTFE, PFAS, and other harmful substances. |
These non toxic pots and pans sets are designed with care.
They make any kitchen, whether in a restaurant or at home, a place for healthy cooking.
They meet the needs of both chefs and home cooks.
Price Range Considerations for Non Toxic Cookware
When you’re looking to buy affordable non toxic cookware, knowing the price range is key.
The market has many options, from cheap to expensive sets.
This means you can find something that fits your budget.
The GreenPan Valencia Pro Series is a great choice for those who want quality and value.
These pans have a ceramic coating that’s safe at high temperatures and works well with metal utensils.
For $100 to $250, this series is a good start for non toxic cookware.
The Caraway Cookware Set is at the higher end. It costs $395 for a 12-piece set.
It has a ceramic non-stick surface and stylish features like sloped sides and notched handles.
This set not only looks good but also cooks safely.
| Brand | Material | Key Features | Price Range |
|---|---|---|---|
| GreenPan Valencia Pro | Ceramic with Thermolon Coating | Diamond-infused layer, high temperature safe | $100-$250 |
| Caraway | Ceramic Non-Stick | Sloped sides, notched handles | $395 |
| Xtrema | 100% Ceramic | Extreme heat resistance, no heavy metals | [Price range] |
Looking at the non toxic cookware price range shows that you can find good, safe options no matter your budget.
From affordable non toxic cookware like GreenPan to the more expensive Caraway, there’s a set for everyone.
It will meet your cooking needs and keep your kitchen safe and healthy.
Environmental Impact and Sustainability of Non Toxic Cookware
Exploring non toxic cookware shows its good environmental impact and support for sustainability.
These options are not just better for your health but also help reduce harm to the environment.
By picking non toxic cookware, you join a bigger effort towards a greener lifestyle.
Look at the materials used in these products.
Brands like GreenPan and Caraway use ceramic and stainless steel.
These are durable and gentle on the planet.
They last longer, which means less waste and more recycling.

Non toxic cookware also cooks well and cleans up easily.
This means using less energy and water over time.
For example, ceramic cookware cooks evenly, saving energy.
Now, let’s look at the materials in eco-friendly cookware:
- Stainless steel is known for lasting a long time and not rusting.
- Ceramic cookware has a non-stick surface without harmful chemicals, cutting down on pollution.
Also, the push for sustainable cookware makes manufacturers produce better.
This lessens the environmental impact even more.
Here’s a table comparing the green features of popular non toxic cookware brands:
| Brand | Material | Key Sustainability Features | Price Range |
|---|---|---|---|
| GreenPan Valencia Pro Series | Ceramic with Thermolon | Diamond-infused Thermolon layer, recyclable, energy-efficient | $100-$250 |
| Caraway Cookware Set | Ceramic non-stick | Functional aesthetics, sloped sides for even cooking, no synthetic coatings | $395 for a 12-piece set |
| Xtrema | 100% Pure Ceramic | Extreme heat resistance, eco-friendly manufacturing process | Varies |
Choosing these options means your cooking supports the environment.
The environmental impact of cookware is greatly reduced.
This choice also pushes manufacturers to make more eco-friendly products.
Non Toxic Cookware and Your Health: What’s at Stake
Looking into the health impact of cookware shows how our kitchen choices affect our health over time.
With worries about toxic chemicals like PFAS, linked to serious health problems, choosing non toxic cookware benefits is key for safer cooking.

Opting for non toxic cookware, like ceramic or stainless steel, lowers the risk of eating harmful chemicals.
It also keeps you and your family safe from dangers in regular cookware.
This includes avoiding harmful fumes when it gets too hot or chemicals leaching into food.
| Type of Cookware | Key Characteristics | Temperature Resistance | Health Considerations |
|---|---|---|---|
| Caraway Nonstick Ceramic | Free from PTFE, PFOA, PFAS, lead, cadmium | Up to 550ºF | Non-toxic; safe for everyday cooking |
| GreenPan Chatham Frying Pan/Skillet | Dishwasher-friendly, long-lasting nonstick surface | Up to 600ºF | Safe for higher heat cooking, no toxic fumes |
| Teflon pans | Low initial cost, widely available | Releases toxic fumes around 500ºF | Potential exposure to toxic fumes |
The table shows that while Teflon pans are cheap and easy to find, they pose health risks at high temperatures.
On the other hand, non toxic options like Caraway and GreenPan are safer.
They can handle high heat without harming your health.
In short, buying non toxic cookware is more than just cooking.
It’s about protecting your health and making your kitchen a safe, healthy space.
It’s a big step in creating a healthy home.
How Non Toxic Cookware Affects Cooking Performance
Switching to non toxic cookware might make you think you’ll lose in cooking performance.
But, that’s not true. Non toxic, non stick cookware makes your kitchen safer and cooks better.
Let’s see how different materials change your cooking.
High-grade ceramic, like GreenPan Valencia Pro Series, has a special coating.
It spreads heat well, so your food cooks evenly. This means no burnt spots.
Plus, it’s easy to clean, so you use less oil and spend less time on dishes.
Stainless steel cookware, like Calphalon Classic Series, also cooks well.
It keeps heat steady, so your food cooks right.
It’s strong and doesn’t warp, keeping your food’s taste and texture just right. And it lasts longer.
- Duration and Temperature: Good non toxic cookware keeps the right temperature. This means faster, more even cooking.
- Healthier Cooking Options: You need less oil with non stick cookware. This helps you eat healthier.
- Easy Maintenance: Cleaning non toxic cookware is a breeze. This saves you time and makes cooking more efficient.
In short, non toxic cookware is safe and boosts your cooking performance.
New technologies make these cookware options better than old ones.
They’re great for any kitchen, offering many benefits.
User Reviews and Testimonials on The Best Non Toxic Cookware
Choosing the right cookware is a big decision. User reviews and testimonials can help a lot.
They show how non toxic cookware works in real life, not just in ads.
These reviews talk about how easy it is to clean the cookware.
Brands like Caraway get praise for their easy-to-clean surfaces. They also heat evenly, which helps prevent food from getting wasted.
Many users say these cookware pieces are great for all kinds of stoves.
They’re perfect for both serious cooks and those who just want to make simple meals.
People love that Caraway cookware is free from harmful chemicals like Teflon.
Analyses of Consumer Feedback
People really like how easy non toxic cookware is to clean.
Caraway’s ceramic non-stick surfaces get a lot of praise.
They’re also good at distributing heat, which helps food cook better.
Users say these cookware pieces are versatile.
They work well with different stoves and are great for all kinds of cooking.
They’re also safe, thanks to being free from harmful chemicals.
How Non Toxic Cookware Stands Up in Daily Use
Users love using non toxic cookware like Caraway.
They like that it’s safe for the oven up to 550°F. This lets them cook in many ways.
They also appreciate the design, which keeps their kitchen tidy.
The cookware is durable and can handle daily use. People are happy with how it lasts.
The Caraway Cookware set has many useful pieces.
There’s a 10.5” fry pan, a 3-quart saucepan, a 4.5-quart saute pan, and a 6.5-quart Dutch oven.
All are made from safe and sustainable materials.
These sets are known for their long-lasting quality. This is something users often mention in their reviews.
Conclusion
Now you know how to choose informed cookware choices for a healthier lifestyle.
You might prefer the GreenPan Valencia Pro Series for its special coating.
Or maybe the Caraway Cookware Set for its design.
The Xtrema 100% Pure Ceramic Cookware is also a great option for those who care about health.
Switching to these brands means you’re not only getting better cookware.
You’re also looking after your health and the planet. It’s a smart move for a greener kitchen.
Many cookware sold in the U.S. is nonstick, but it doesn’t last long.
It’s often made with PTFE, which isn’t good for us. But, there’s a shift towards better materials like cast iron and ceramic.
This change is because of the dangers of PFAS in cookware. It’s a big problem in many states. So, choosing non-toxic options is a smart choice.
Choosing non-toxic cookware is more than a trend. It’s a way to take care of yourself and the planet.
It’s an investment in your well-being.
By picking good brands like Caraway and Xtrema, you’re setting up a safer kitchen.
You’re also making sure you’ll enjoy cooking for years to come.
It’s time to upgrade to non toxic cookware. Start your journey to a healthier, tastier kitchen today.
FAQ
What are the benefits of using the best non toxic cookware?
Non toxic cookware is healthier for cooking. It reduces the risk of toxic chemicals in your food. It’s also better for the planet and cooks food well, thanks to even heat and durability.
Why should I choose non toxic pans and sets over traditional cookware?
Non toxic pans avoid harmful chemicals like PFAS and PTFE. These are common in old nonstick cookware. Switching to non toxic cookware makes cooking safer and cuts down health risks.
What materials should I look for when searching for non toxic cookware?
Look for ceramic cookware with safe coatings like Thermolon. Also, high-quality stainless steel is safe and cooks well. These materials are safe, last long, and cook food well.
Are there specific non toxic cookware brands you recommend?
Yes, top brands include GreenPan, Caraway, and Xtrema. GreenPan’s Valencia Pro Series has safe Thermolon layers. Caraway offers stylish and practical sets. Xtrema’s ceramic cookware is heat-resistant and safe.
Can non toxic cookware be used by both professional chefs and home cooks?
Yes, non toxic cookware is for everyone. It comes in various sizes and sets for all kitchens. Whether cooking for one or many, there’s a set for you.
How does the price range of non toxic cookware compare to traditional cookware?
Non toxic cookware prices vary. But, there are affordable options for all budgets. They’re a smart choice for health and durability over time.
What is the environmental impact of using non toxic cookware?
Non toxic cookware is eco-friendly. It reduces pollution from harmful chemicals. Materials like ceramic and stainless steel last longer, reducing waste and carbon footprint.
Are there any health implications I should be aware of when using non toxic cookware?
Non toxic cookware lowers your risk of toxic chemicals. This reduces health risks like cancer and thyroid disease. It’s safer for your body.
Does non toxic cookware affect the performance of my cooking?
No, it actually improves cooking. High-quality ceramic cookware cooks evenly and is easy to clean. Stainless steel cooks fast and is great for searing.
What do user reviews and testimonials say about non toxic cookware?
User reviews love non toxic cookware. They praise its quality and performance. Brands like GreenPan and Caraway are known for their non-stick abilities and durability.
Affiliate Disclosure
This article contains affiliate links, including to Amazon. If you make a purchase or download through these links, I may earn a small commission at no extra cost to you.
Save Big on Cookware with Coupert – Here’s How to Do It

Ever wish you could save $180 or more a year without lifting a finger?
Well, you can. Coupert is a free browser extension that saves you money on cookware (and a whole lot more) without breaking a sweat.
It’s like having a friend at checkout whispering, “Hey, here’s a better deal.”
And all you have to do is click “Install.”
Let’s dive in. I’ll walk you through every step to get it set up and running.
Trust me, it’s easy.
Step 1: Get Coupert on Your Browser
First things first: Coupert works only on desktop browsers. If you’re used to shopping on your phone, this will be a little different, but it’s worth it.
- Go to Coupert’s Site – Head over to coupert.com (no need to search around).
- Download the Extension – Just click to add it to your browser. It works on Chrome, Firefox, and Edge.

- Activate It – Once it’s installed, you’ll see a Coupert icon up by your browser’s address bar. That’s your little money-saver, ready to go.
Done in about a minute, right?
You’re all set to start saving on your next cookware purchase.
Step 2: Shop for Your Cookware
Now the fun begins.
Go to your favorite cookware stores—think Amazon, Macy’s, Walmart—or any other store you love.
As you shop, Coupert hangs out in the background, waiting to do its thing.
Step 3: Let Coupert Do the Hard Work
Here’s the magic part. When you get to checkout, Coupert jumps in.
You’ll see a little popup asking if you want to try out coupons. Say yes, and it’ll go to work.

In seconds, Coupert scans all the coupon codes out there and tests them.
It’ll automatically pick the best one for you, so you don’t have to do a thing.
The price just drops. It’s like a surprise discount every time.
Step 4: Earn Cash Back on Cookware Too
With Coupert, there’s more than just coupon savings. You also get cash back from many stores.
So not only does it find you discounts, but you also get money back.
That’s like double-dipping on savings.
Every little bit adds up, and you can track your cashback balance right in the Coupert extension.
Why Coupert Is Worth It
Other tools make you dig around for coupon codes. Coupert?
It’s like having a buddy who always knows the best deals.
Plus, Coupert doesn’t just grab coupons; it finds cashback deals too.
You just shop, and Coupert finds the best deal without making you do a thing. Easy as that.
Ready to Start Saving?
Get Coupert today. Click to add it to your browser, then shop like normal.
Watch your savings pile up. You’ll wonder how you ever shopped without it!
Affiliate Disclosure
This article contains affiliate links, including to Amazon. If you make a purchase or download through these links, I may earn a small commission at no extra cost to you.
Top 5 Cookware Deals Stores Don’t Want You to Find!

Get ready to score cookware deals that stores don’t want you to find.
With these discounts, you’ll cook like a pro and keep more money in your pocket.
So don’t miss out.
Dive in, grab these deals, and discover how to save even bigger with this hidden tool that adds instant savings on top.
Here are the top 5 cookware deals that’ll blow your mind.
Here Are The Top 5 Cookware Deals
1. Grab Lodge Cast Iron Deals on Amazon
Amazon often runs excellent deals on Lodge cast iron cookware.
For instance, you can score a 5-quart Lodge Dutch oven for around $50, originally priced closer to $76.
- Price: Around $44 (original price $76)
- Link: Lodge 5-Quart Cast Iron Dutch Oven on Amazon
“For extra savings on this deal, use The Secret Tool At the end of This Article for cashback and more discounts.”
Cast iron lasts a lifetime, and Lodge’s pre-seasoned cookware makes it easy to use and maintain.
Cast iron Dutch ovens are versatile for baking, roasting, and slow-cooking, and with Amazon’s frequent discounts, these pieces are budget-friendly and long-lasting
2. Le Creuset and Staub Sales at Macy’s and Amazon
For fans of enameled cast iron, both Le Creuset and Staub offer significant savings during major sale events.
Amazon has recently discounted the Le Creuset Signature Skillet to $190 from $220.
Le Creuset Signature Skillet on Amazon
- Price: Around $190 (original price $243)
- Link: Le Creuset Signature Skillet on Amazon
“For extra savings on this deal, use The Secret Tool At the end of This Article for cashback and more discounts.”
Macy’s and other major retailers often match these discounts, especially on Black Friday and Cyber Monday.
Staub is also a top choice, with discounts up to 35% off at places like Amazon and Macy’s, which is a rare find for premium brands
3. All-Clad Stainless Steel Fry Pans and Sets
For stainless steel, look out for All-Clad deals, especially for their popular frying pans and tri-ply bonded sets.
All-Clad often offers discounts up to 40% on their high-quality, oven-safe cookware, which retains heat exceptionally well.
Right now, Amazon has deals on the 10-inch stainless steel All-Clad pan at $133, down from $160.
All-Clad 10-Inch Stainless Steel Fry Pan on Amazon
- Price: $133 (original price $160)
- Link: All-Clad 10-Inch Fry Pan on Amazon
“For extra savings on this deal, use The Secret Tool At the end of This Article for cashback and more discounts.”
If you want quality stainless steel cookware without breaking the bank, these discounts make All-Clad more accessible
4. GreenPan Nonstick Cookware Sets at Target
For nonstick lovers, GreenPan offers discounts as high as 65% off, especially during holiday sales and Black Friday events.
Target and other big-box retailers run exclusive GreenPan discounts on popular items like the 10-piece sets and individual fry pans.
Known for being PFAS-free, GreenPan is a healthier choice for nonstick, and the sale prices often make it a good budget option.
- GreenPan Rio Collection: This line features ceramic nonstick cookware sets and individual pieces. The GreenPan Rio 16pc Nonstick Aluminum Cookware Set is available, with prices ranging from $119.99 to $179.99
- Individual Frying Pans: Target offers GreenPan Rio ceramic nonstick frying pans in various sizes:
- 10″ Ceramic Nonstick Frying Pan priced at $24.99
- 12″ Ceramic Nonstick Frying Pan priced at $29.99
- Other Collections: Target also carries other GreenPan lines, such as:
- GreenPan Studio 12pc Ceramic Nonstick Aluminum Cookware Set in black, priced at $159.99
“For extra savings on this deal, use The Secret Tool At the end of This Article for cashback and more discounts.”
5. Tramontina Budget-Friendly Options at Costco and Walmart
Tramontina, a go-to for affordable quality, has consistent discounts at Costco and Walmart.
The Tramontina 10-inch nonstick restaurant-style fry pan is sometimes available for just $28 (down from $45).
Tramontina Nonstick Fry Pan at Walmart
- Price: Around $54 (original price $60,99)
- Link: Tramontina 10-Inch 2 Set Nonstick Restaurant Fry Pan at Walmart
This brand is perfect for those who want reliable cookware without a huge price tag.
For under $60, it’s hard to find a better value, and these deals typically stick around during seasonal sales.
Unlock Extra Cookware Deals Savings with Coupert – Don’t Miss Out on These Hidden Discounts!
You’re eyeing these cookware deals, right? Imagine knocking those prices down even more.
Coupert is your secret weapon. It’s fast, free, and finds hidden discounts automatically.
Here’s how it makes these deals—and almost anything else—way cheaper.
Here’s How Coupert Stacks Up Your Savings:
- Add Coupert to Your Browser – It’s free and takes seconds to set up. No fuss, just savings.
- Shop Like Usual – Go to Amazon for that Lodge Dutch oven or Macy’s for the Le Creuset skillet. Coupert works quietly in the background, hunting down extra coupon codes for you.
- See the Savings Pop Up – When Coupert finds a deal, you’ll see a little pop-up. Click it, and bam—extra discounts are added instantly. No code hunting. No guesswork.
- Double Down with Cashback – Coupert doesn’t just find coupons. It also gives cashback on many purchases. So, if you score a deal on the All-Clad pan or GreenPan set, Coupert might add cashback on top! Save two ways—more money back in your pocket.
- Works on Almost Any Product – These cookware deals are just the start. Coupert’s magic works on thousands of sites, from household goods to daily essentials. More places. More deals. More savings.
Why Wait? Start Saving Big with Coupert!
Every time you shop, Coupert unlocks the best hidden deals, making good prices unbelievable.
Get Coupert now, and turn every shopping trip into a money-saving mission.
It’s fast. It’s free. And it’s packed with savings.
Click here to get started with Coupert!
Affiliate Disclosure
This article contains affiliate links, including to Amazon. If you make a purchase or download anything through these links, I may earn a small commission at no extra cost to you.
Steak Temperature Chart – Perfect Steak Every Time

Steak Doneness and Temperature Chart
Cooking steak isn’t hard. But getting it right? That comes down to temperature. And here’s where the Steak Temperature Chart will help you.
It’s not about how long it’s on the grill or in the pan. It’s about what’s happening inside the steak.
This is what makes it rare, medium, or well-done. If you want steak that’s juicy and tender, you need the right temp.
Here’s why it matters. A rare steak feels soft and cool in the middle.
Medium-rare gives you a warm center that’s still juicy.
Well-done makes it firm with less juice. Each level of doneness gives you a different taste and feel. The temperature makes that happen.
Don’t worry, though. You don’t have to guess.
A steak temperature chart shows you what to aim for. Use a thermometer and check as you cook.
Want an easy way to get it right every time? Download our free steak temperature chart PDF. Keep it close when you cook. It’ll help you get your steak perfect, no matter what.
Doneness Levels and Ideal Internal Temperatures
Let’s talk steak doneness. You want to know when your steak is just right?
It’s all about the temperature inside. That’s what makes it rare, medium, or well-done.
Each doneness level has a different taste and feel.
Here’s a simple breakdown:
- Rare (120-125°F): The middle is cool and red. Soft and very juicy.
- Medium-Rare (130-135°F): The center is warm and red. Still juicy.
- Medium (140-145°F): Pink in the center. It’s a little firmer but still has juice.
- Medium-Well (150-155°F): Slightly pink inside. Firm and not as juicy.
- Well-Done (160°F+): No pink. It’s firm and dry.
Always use a meat thermometer. It helps you know exactly when your steak is done. Just stick it into the thickest part of the steak and check.
Want this guide on hand while you cook? Download our steak temperature chart PDF. It makes everything easier!
How to Use a Meat Thermometer Correctly
Using a meat thermometer makes cooking steak simple. No guessing. You’ll know exactly when it’s done.
Here’s how. Stick the thermometer into the thickest part of the steak.
Make sure you avoid any bone or fat, as they can give you the wrong reading.
You want to measure the temperature of the meat itself.
Once you get a reading, you’ll know what to do.
For example, if you’re aiming for medium-rare, take the steak off the heat when the thermometer shows 130-135°F.
Don’t wait too long, though. Temperatures can rise fast.
After you pull the steak off the heat, let it rest for at least 5 minutes. This step matters.
The temperature will go up by a few degrees, and the juices will settle back into the meat.
This makes your steak taste juicier and more tender.
To make things even easier, download our steak temperature chart PDF. Use it with your thermometer to make sure you always get the perfect steak!
Best Steak Cuts and Ideal Temperatures
Not all steaks are the same. Different cuts need different temperatures to taste just right.
Let’s look at some popular cuts and the best temps for each.
- Ribeye: This cut has a lot of marbling (fat). For that juicy, melt-in-your-mouth bite, aim for medium-rare at 130-135°F. If you like it a bit more done, medium at 140-145°F still works well.
- Filet Mignon: Super tender with less fat. It’s best cooked medium-rare at 130-135°F to keep that soft texture. If you go higher, it might lose some of its tenderness.
- Sirloin: Leaner but still tasty. For a perfect balance, aim for medium at 140-145°F. You can go to medium-well if you prefer it firmer.
- New York Strip: This one’s juicy with a good chew. For the best flavor, go for medium-rare at 130-135°F or medium at 140-145°F.
Each cut has its sweet spot, and knowing the right temp makes all the difference.
Want to get it perfect every time? Download our steak temperature chart PDF. It’s got all the details you need to cook every cut just right!
Cooking Tips for Perfectly Cooked Steak Every Time
Cooking steak right can feel tricky, but it’s easy if you avoid a few common mistakes.
First off, don’t overcook or undercook your steak. It can be hard to know when it’s done just by looking at it.
That’s why a thermometer is your best friend. You can check the temperature and get it perfect every time.
Another mistake? Not letting your steak rest.
Once you pull it off the heat, leave it for 5 minutes. This helps the juices stay in the steak, making it more tender and flavorful.
Now, let’s talk about cooking methods.
If you’re grilling, use high heat to get a nice sear, then move it to a cooler spot to finish cooking.
For pan-searing, start with a hot pan to get that crispy outside, then lower the heat.
No matter what method you use, check the internal temp to hit the right doneness.
Whether you’re grilling or pan-searing, you need the right temp. Download our steak temperature chart PDF to get the perfect doneness every time. Keep it handy while cooking!
Bonus: Advanced Steak Cooking Methods
Ever heard of the reverse sear?
It’s one of the easiest ways to cook steak perfectly, especially when you’re working with thicker cuts.
Here’s how it works. First, cook your steak slowly at a low temperature.
You can do this in the oven or on the cooler side of your grill. This keeps the inside cooking evenly.
When the steak hits the right temperature, finish it off with a quick, hot sear.
This gives you that perfect crispy outside while keeping the inside juicy.
The reverse sear works best with thick steaks like ribeye or New York strip.
It helps you avoid drying out the edges while making sure the inside cooks evenly.
Make sure to check the temperature using our chart so you know the exact moment to sear.
Want to dive deeper into techniques like this?
We’ve got more resources to help you master them.
Download our free steak temperature chart and explore methods like the reverse sear.
You’ll love how simple it is to get the perfect steak every time!
Final Thoughts + Download the Steak Temperature Chart
Cooking steak is easy when you know the right temperature. A steak temperature chart helps you get it right, no matter if you like it rare, medium, or well-done.
It takes the guesswork out.
With the chart, you’ll always know when to pull the steak off the heat.
No more guessing, no cutting too soon. Just perfect steak every time. It works for grilling, pan-searing, or even baking.
Want to cook steak perfectly every time?
Download our free steak temperature chart PDF. Keep it handy, and you’ll never wonder if your steak is done again!
Suggested Posts You Might Find Interesting:
Additional Resources
- Steak University: The Ultimate Guide to Steak Temperatures
This comprehensive guide provides detailed information on steak doneness levels, ideal temperatures, and cooking tips.
Visit Steak University - Omaha Steaks: Steak Doneness Guide & Temperature Charts
Omaha Steaks offers expert-tested secrets for cooking the perfect steak, including a detailed temperature chart for various doneness levels.
Visit Omaha Steaks
Affiliate Disclosure
This article contains affiliate links, including to Amazon. If you make a purchase through these links, I may earn a small commission at no extra cost to you.
How to Cook Ground Beef for Spaghetti: Step-by-Step Guide
How to Cook Ground Beef for Spaghetti: What you’ll learn

In this guide, you’ll learn how to cook ground beef for spaghetti the right way.
We’ll walk through each step to help you create a dish that’s rich, flavorful, and perfectly balanced.
You’ll find tips on choosing the right beef, seasoning it, and mixing it into a delicious sauce.
Whether you’re a beginner or looking to improve your cooking, we’ve got you covered.
From tips on how long to cook your beef, to tricks used by famous chefs like Jamie Oliver and Gordon Ramsay.
This guide will help you make spaghetti that tastes like it came from a restaurant.
Ready to make the perfect spaghetti with ground beef?
Let’s dive in!
Why Ground Beef is Key for Great Spaghetti
Ground beef makes spaghetti amazing. Without it, spaghetti feels plain.
The beef gives it that rich taste that makes every bite satisfying.
When you cook ground beef just right, it mixes with the sauce and makes everything taste better.
But you have to get it right. You don’t want beef that is too greasy. And you don’t want it to be too dry.
If you mess up the beef, the sauce will not be good either.
So let’s make sure we get the beef perfect. It’s simple, but it changes everything.
How Much Beef Do You Need?
So how much beef should you use? For most meals, you want 1 pound of ground beef.
That should feed 4 to 6 people. If you love a lot of meat in your sauce, use more.
If you want less, cut it back. It’s up to you. But 1 pound is a good place to start.
Disclaimer: This post contains affiliate links. If you click and purchase anything, I may earn a commission.
Rising Ground Beef Prices and a Fun Way to Save:
Ground beef prices have gone up a lot lately. In 2024, it costs $5.50 to $6.00 per pound.
Just five years ago, it was around $4.00.
That’s a big jump, and it can make cooking meals like spaghetti more expensive.
You’re probably feeling it in your grocery bill, right?
But there’s a fun way to save some money on your next trip to the store.
Win a $250 Walmart Gift Card!
Want to save on groceries, especially with ground beef prices going up?
You could win a $250 Walmart gift card!
Imagine getting your ground beef for free, along with a bunch of other groceries.
That $250 can go a long way toward making your spaghetti dinners and other meals a little easier on your wallet.
It’s easy to join the fun. Enter the Walmart Gift Card Sweepstakes and see if you get lucky.
Who wouldn’t want to win $250 and cut down on those rising grocery prices?
Go ahead, take a chance, and maybe your next ground beef will be on Walmart!
What Type of Beef is Best?
You need to choose the right type of beef. You’ll see numbers like 80/20 or 90/10 at the store.
This just means how much meat there is and how much fat there is. For spaghetti, go with 80/20. That’s 80% lean meat and 20% fat. This mix gives you juicy beef that is not too greasy.
If you use beef that has more fat like 70/30, it will be too greasy. It will make your sauce oily.
But if you use something like 90/10, it will be too dry. You will not get that juicy, flavorful beef.
Trust me, 80/20 is perfect for spaghetti.
Pro Tip: Go for 80/20 Beef
80/20 beef is the way to go. It’s the best for cooking ground beef for spaghetti. It won’t dry out, and it won’t leave your sauce oily.
Real Example
Let’s say you try to cook beef that’s 70/30. When you cook it, too much fat comes out.
The meat doesn’t brown right. It almost looks like it’s boiling. Now your sauce will taste greasy.
But when you use 80/20, it browns nicely. The beef gets that crispy edge.
It makes your sauce taste rich and hearty. That’s what you want.
Choosing the Right Amount and Type of Ground Beef For Spaghetti
It’s important to know how much ground beef to use and what type is best. This can make or break your spaghetti.
Below is a simple table to help guide you.
It shows the ideal amount of beef depending on how many people you’re feeding, plus the best meat-to-fat ratio for juicy, flavorful beef.
This will help you avoid greasy or dry meat, so your spaghetti turns out perfect every time.
Ground Beef Guide for Spaghetti
| Number of People | Amount of Ground Beef | Best Meat-to-Fat Ratio (Lean-to-Fat) | Why It’s Best |
|---|---|---|---|
| 1-2 | 0.5 lb | 80/20 | Juicy, flavorful, won’t dry out or get oily |
| 4-6 | 1 lb | 80/20 | Perfect balance for a family meal |
| 6-8 | 1.5 lb | 80/20 | Keeps the sauce hearty without being greasy |
| 8+ | 2+ lbs | 80/20 | Best for large groups, great texture |
Explainer
- 80/20 ground beef means it’s 80% lean meat and 20% fat. This ratio gives your spaghetti sauce the right amount of richness without being too greasy.
- If you go with 70/30, it can make your sauce too oily.
- If you choose 90/10, the beef may come out too dry. You need that bit of fat to keep things juicy.
How to Choose the Right Ground Beef for Spaghetti
You already know that 80/20 ground beef is the best choice for spaghetti.
When you go to the store, picking the right ground beef for spaghetti can make or break your dish.
It’s easy once you know what to look for.
Let’s get you the best beef for your spaghetti.
Look at the Color
First thing, check the color. Fresh beef is bright red. It looks alive.
If it’s brown or grey, that’s a problem. A little brown inside is okay.
That happens when the beef doesn’t get air.
But if it’s grey on the outside, don’t use it.
Fresh beef should be red and look fresh.
Feel the Beef
Give it a feel. Fresh beef is firm. When you press it, it should spring back a little.
If the beef feels sticky or slimy, that’s bad.
It’s going bad. Slimy beef won’t cook right, and it’s not safe to eat.
You want beef that feels firm and solid, not slimy or wet.
Smell the Beef
Smell is important. Fresh beef doesn’t have much smell at all.
If you open the package and it smells sour or like something’s wrong, toss it.
Beef should smell clean. Your nose knows when beef isn’t right. Trust it.
Signs the Beef Is Bad
- Brown or grey color: Red means fresh. Grey or brown is bad.
- Sticky feel: Slimy beef is a no-go. Fresh beef feels firm, not sticky.
- Sour smell: Bad beef smells off. Fresh beef smells neutral.
Picking the right beef makes all the difference.
Once you have good beef, your spaghetti will be full of flavor.
Now that you know the secret to perfect beef, let’s get hands-on. The next step is to prepare your beef before you cook it. Ready? Let’s dive in!
Prepping the Ground Beef For Spahetti
Before you cook, you need to get the beef ready. This part is simple but very important.
First, let the beef sit out for 10 minutes. Why?
Cold beef does not cook right. If you throw cold beef into the pan, it won’t brown well.
Some parts will cook faster. Others will stay raw. So, let it warm up a little.
It will cook evenly and brown better this way.
Break It Apart
Now, take the beef and break it into smaller pieces. Use your hands or a spoon.
Do this before you cook it. Don’t just toss a big lump of beef into the pan.
It won’t cook right. It will steam and turn grey.
You want the beef to brown and get crispy edges. That’s where the flavor comes from.
So, make sure to break it up first.
Don’t Overfill the Pan
This is where people make mistakes. They put too much beef in the pan.
If you crowd the pan, the beef won’t brown.
It will steam.
It will turn grey. You don’t want that.
You need to give the beef space. It needs room to brown.
If you are cooking a lot of beef, cook it in batches. Don’t rush it.
Let it brown properly.
That’s where the good flavor comes from.
Pro Tip: Break the Beef and Give It Space
Always break the beef into smaller pieces before cooking. Don’t overfill the pan.
The beef needs room to cook. If the pan is too full, the beef will steam and not brown.
If you have a lot of beef, cook it in batches.
Your beef is now prepped. Now comes the fun part.
Let’s cook the beef and get that perfect brown crust.
Are you ready to make your spaghetti taste amazing?
Let’s get to cooking!
Cooking Ground Beef for Spaghetti
Now… let’s have a look on how Gordon Ramsay and Jamie Oliver cooks Ground beef…
Finishing Touches for Ground Beef for Spaghetti
Now it’s time to pull it all together. You’ve cooked your ground beef, and it smells amazing. Your pasta is ready.
The next step is mixing everything. Take your drained pasta and toss it with the beef and sauce.
This step is simple but important. Let it all simmer for a minute.
This helps the sauce stick to the pasta. It makes every bite taste rich and full of flavor.
Let It Simmer
After mixing the pasta, sauce, and beef, let it simmer for a minute. Not too long. Just enough for the flavors to blend.
The beef gets even more juicy, and the sauce sticks to the pasta.
This quick simmer makes a huge difference. It turns good spaghetti into great spaghetti.
Worried About Dry Beef?
It’s normal to worry that your beef might dry out. But don’t worry. If you keep the heat low, the beef will stay tender.
The sauce helps keep it juicy. If you’re still unsure, you can use our Beef Temperature Calculator to check if the beef is cooked just right.
That way, you can be sure it’s perfect every time.
Pro Tip: Add Parmesan
Want to make your spaghetti even better? Add freshly grated Parmesan on top.
This makes the dish taste richer. The cheese melts into the sauce, adding that extra flavor.
Just a sprinkle of Parmesan can turn a simple spaghetti dish into something special.
You’ve mastered the basics. But there’s always more to learn.
Ready for some expert tips to make your spaghetti even better?
Let’s dive into those next!
Final Tips for Perfect Spaghetti
You’ve made it this far, and your spaghetti is almost perfect.
But there are a few more things you can do to take your dish to the next level.
It’s all in the small details.
Let’s make your spaghetti even better with some easy tips.
Simmer for Extra Flavor
If you want deeper flavor, try simmering the sauce and beef together for a little longer.
This gives the sauce more time to absorb the rich taste of the beef.
You can let it simmer for another 10 to 15 minutes.
The longer it simmers, the richer the flavor.
Your kitchen will fill with the smell of herbs, tomatoes, and beef blending together.
It makes each bite even more satisfying.
Add Vegetables for More Depth
Want to make your sauce even heartier?
You can add sautéed vegetables like onions, mushrooms, or bell peppers.
These veggies add more texture and a deeper flavor to the sauce.
Chop them up and cook them in a little olive oil before adding them to your sauce.
They’ll mix with the beef and sauce, making your dish taste fuller and more balanced.
Worried About Too Many Ingredients?
Some people worry that adding extra ingredients might complicate things or overpower the beef.
Don’t worry.
The key is to keep it simple. Use just a few vegetables.
They add to the dish without making it overwhelming.
Think of it like building layers of flavor.
You don’t need a lot, just the right amount.
Pro Tip: Add a Pinch of Sugar
Here’s a trick. If your sauce tastes too acidic because of the tomatoes, add a pinch of sugar.
It’s a small thing but makes a big difference.
The sugar balances out the acidity, making the sauce smoother.
This little tip takes your spaghetti sauce to a whole new level.
You’ve mastered cooking ground beef for spaghetti, but what else can you do?
Stick around for more tips and recipes to improve your cooking even more!
Resource List
Here are some helpful resources to level up your cooking and learn more about perfecting your beef dishes:
- Reverse Sear New York Strip: A Foolproof Guide for Perfect Steak Learn the reverse sear method to cook the perfect New York Strip steak. This guide breaks down how to use this technique to get a juicy, evenly cooked steak every time.
- Martha Stewart Cookware – Comprehensive Guide Looking to upgrade your kitchen tools? Check out this guide on Martha Stewart cookware, covering everything you need to know about her high-quality kitchen sets.
- Internal Temp for Medium Ribeye Steak: The Perfect Guide to Juicy Results Every Time Learn the exact internal temp for medium ribeye steak to ensure your steak is cooked to perfection, juicy, and full of flavor.
- New York Strip vs Ribeye: The Ultimate Steak Showdown Not sure which steak to choose? This article compares the New York Strip vs Ribeye, helping you decide which cut is best for your next meal.
- Beef Temperature Calculator: The Secret Tool to Perfect Steak Every Time Use the Beef Temperature Calculator to get the perfect cooking time and temperature for your steak or ground beef. This tool helps ensure juicy and flavorful beef, no matter how you cook it.
- Gordon Ramsay Recipes – The Top 10 Looking for some inspiration? Here are the top 10 Gordon Ramsay recipes you can try at home, ranging from simple to restaurant-level dishes.
- Gordon Ramsay Knives by Royal Doulton Find out why Gordon Ramsay trusts Royal Doulton knives. This guide explains the features and benefits of these top-quality knives.
- Gordon Ramsay Knives – The Right Ones Explore the best knives Gordon Ramsay recommends for home and professional chefs alike. Learn how to choose the right Gordon Ramsay knives for your kitchen.
- Gordon Ramsay Pans He Uses Curious about the pans Gordon Ramsay uses in his kitchen? This guide covers the best Gordon Ramsay pans to help you cook like a pro.
Affiliate Disclosure
This article contains affiliate links, including to Amazon. If you make a purchase through these links, I may earn a small commission at no extra cost to you. Additionally, I’m promoting a sweepstakes for a chance to win a $250 Walmart gift card. Participation is free and requires valid information. No purchase necessary.
Reverse Sear New York Strip: A Foolproof Guide for Perfect Steak
What is the Reverse Sear New York Strip Method?

Disclosure: As an Amazon Associate, I earn from qualifying purchases.
You want to cook the perfect reverse sear New York strip steak.
This method makes that easy. You cook the steak slowly at first.
You let it heat gently in the oven. The heat spreads through the steak evenly.
No overcooked edges. Just juicy meat from edge to edge.
Imagine slicing into the steak.
The inside is pink. Every bite is tender. This happens because the reverse sear New York strip method works.
After the oven, you sear it in a super hot pan. This step gives the steak a crispy crust.
The meat stays juicy inside. It’s like getting the best of both worlds.
Tender on the inside. Crispy on the outside.
Why Does Reverse Sear Work So Well?
The reverse sear method gives you control.
You will know exactly how your steak will turn out. No more guessing.
You won’t burn the outside and leave the inside raw.
You can stop cooking the moment it’s done the way you like it.
Normally, steaks cook fast on high heat. That makes it easy to overcook or burn the outside.
With the reverse sear New York strip, the oven does most of the work.
The steak heats slowly. It cooks all the way through. The final sear just gives the steak a crispy finish.
Why This is the Best Way to Cook a New York Strip
Other methods don’t compare to the reverse sear New York strip.
They might get the job done fast. But this method gives you something special.
Juicy steak on the inside. A crackling crust on the outside.
It’s the best way to cook a New York strip because it’s almost foolproof.
Even if this is your first time cooking steak, you can get amazing results.
This method is simple. It makes you look like a pro.
When you slice into the steak, you’ll see it’s cooked just right.
Every time.
Now that you see why reverse searing is the best way to cook a New York Strip,
let’s take a look at the tools and ingredients you need to make it happen…
What You Need to Get Started
Tools Needed for Reverse Sear
You don’t need a fancy setup for the reverse sear steak method.
Just a few basic tools:
First, an oven!
You will cook the steak low and slow in there.
Next, Heavy-Bottomed Skillet (like cast iron): A cast iron pan holds heat well, giving you that perfect sear and crispy crust.
Next, Tongs: Use tongs to flip your steak. Forks pierce the meat, causing juices to escape, which can leave your steak dry.
Then, Timer: Keep track of your cooking time.
While cooking time depends on the thickness and type of steak, timing helps you avoid overcooking.
Lastly, a meat thermometer is a must.
This helps you check the steak’s temperature as it cooks.
With a thermometer, there is no guessing.
You’ll know when your steak hits the right temperature every time.
And of course, you need a New York strip steak.
Essential Tools for Reverse Searing
You only need a few things to make your reverse sear New York strip perfect.
Each tool plays an important role.
Here’s a simple table to show you what you need and why it matters.
| Tool | Why You Need It |
|---|---|
| Oven | Cooks the steak slow so it stays juicy inside |
| Cast Iron Pan | Gives the steak that crispy crust on the outside |
| Meat Thermometer | Tells you exactly when the steak reaches the right temperature |
| New York Strip Steak | Thick cuts work best for this method so it cooks evenly |
| Tongs | Use tongs to flip your steak without piercing it, so juices stay inside, keeping the steak juicy |
| Timer | Helps track cooking time and avoid overcooking, especially with thick or different steak types |
These tools are simple but powerful. Each one helps you cook your steak perfectly.
With them, your steak will turn out juicy and crisp every time.
With the right tools ready, you’re set to start cooking.
But before we jump into the method.
Let’s talk about choosing the right New York Strip…
Choosing the Perfect New York Strip for Reverse Searing
Why a Thick Cut is Important
To get the best results with the reverse sear New York strip, you need a thick cut.
A steak that is 1 ½ to 2 inches thick works perfectly.
Thicker steaks cook slow. The inside stays juicy.
When you finish with a sear in a pan, the outside gets crispy.
Thin steaks cook too fast. By the time you try to sear, the inside is already overdone.
You lose control of the cooking. That is why thickness really matters.
What to Look for in a New York Strip Steak
When you are picking a New York strip steak, you need to look for marbling.
Marbling is the fat that runs through the meat. This fat melts as the steak cooks.
It makes the steak tender and full of flavor. A steak with good marbling will not dry out.
Look for even fat spread across the steak. The color of the steak also matters.
A fresh New York strip should be bright red. Avoid steaks that look dull or gray.
If the steak has a thin layer of fat along the edge, that’s good.
It will melt and help give your steak a crispy crust when you sear it.
The Ideal Thickness for Reverse Searing
A thin steak will not work well with the reverse sear method.
It heats up too fast. You lose the chance to slowly cook the inside.
When you try to sear, the steak is already overcooked.
A steak that is at least 1 ½ to 2 inches thick is perfect.
You can slowly cook it in the oven. You have more control over the temperature.
Then, when you sear, the steak gets a crispy golden crust while staying tender inside.
Why New York Strip is a Great Choice for Reverse Searing
The New York strip is one of the best cuts for reverse searing.
It has the right balance of meat and fat. The fat helps keep the steak juicy during the slow cook.
The strip steak also has enough thickness for this method.
When you finish it off in the pan, the fat melts and gives you a crispy, flavorful crust.
The reverse sear brings out the best in this cut.
You get a juicy inside with a crispy outside every time.
Now, Let’s take a quick look at how chef Gordon Ramsay does it differently…
Step-by-Step Guide to Reverse Sear a New York Strip
How to Reverse Sear Steak: A Simple Method
This method makes it easy to get the perfect steak every time.
Follow these steps, and you’ll have a juicy steak with a crispy crust.
Step 1: Preheat the Oven
First, set your oven to a low temperature. Around 250°F is perfect.
This is where you will cook the steak slowly. The low heat warms the steak from the inside out.
You want the inside to cook before you sear the outside.
It gives you control. This is the key to the reverse sear method.
Step 2: Season the New York Strip Steak
Now take your New York strip steak. Season it well.
Use salt and pepper. Be generous. The seasoning will stick to the steak as it cooks.
Imagine the crust forming when you sear it later. You want the steak full of flavor.
Don’t be shy with the seasoning. Cover both sides.
Step 3: Cook the Steak Low and Slow
Put the steak in the oven. Let it cook low and slow.
This is the important part of the step-by-step reverse sear guide.
The steak will warm up evenly. You won’t get any cold spots.
Let it cook until it reaches about 10-15 degrees below your target doneness.
Use a meat thermometer or the Beef Temperature Calculator to check. This step takes time, but it’s worth it.
Step 4: Sear on High Heat in the Cast Iron Pan
Now heat up your cast iron pan. Get it really hot. You want the pan smoking.
Take the steak out of the oven and put it in the pan. You will hear a loud sizzle.
That’s the sound of the crust forming. Sear each side for about 1-2 minutes.
The outside will turn golden brown and crispy. The inside will stay juicy.
Step 5: Rest the Steak Before Slicing
This step matters. Take the steak out of the pan. Let it rest for at least 5 minutes.
The juices inside the steak will settle. If you cut it too soon, those juices will run out.
Resting keeps the steak juicy. When you slice into it, the steak will be perfect.
Now that you know how the reverse sear works, let’s look at a complete recipe you can follow.
Reverse-Seared New York Strip Recipe
Prep Time: 10 minutes
Cook Time: 40-50 minutes
Total Time: 50-60 minutes
Ingredients:
For the Steak:
- 1 New York strip steak (1 ½ to 2 inches thick)
- 1 tablespoon olive oil
- Salt (to taste)
- Freshly ground black pepper (to taste)
For the Butter Baste (Optional):
- 2 tablespoons unsalted butter
- 2 garlic cloves (smashed)
- 1-2 sprigs fresh rosemary or thyme
Instructions:
Prepare the Steak
- Preheat the oven: Set your oven to 250°F. This low temperature will help cook the steak evenly from the inside out, making it tender.
- Season the steak: Take your New York strip steak and rub both sides with olive oil. Season it generously with salt and pepper. Be sure to cover the steak well. You want each bite to have flavor.
Cooking Low and Slow
- Cook the steak in the oven: Place the steak on a wire rack set over a baking sheet.
This setup allows the air to circulate, cooking the steak evenly.
Put the steak in the preheated oven and cook it until it reaches an internal temperature of 10-15 degrees below your desired doneness (use the chart below to guide you).
This will take about 30-40 minutes, depending on your oven and steak thickness.
Use a meat thermometer to check the temperature.
| Doneness | Internal Temp Before Searing | Final Temp After Searing |
|---|---|---|
| Rare | 115°F to 120°F | 120°F to 125°F |
| Medium-Rare | 120°F to 125°F | 130°F to 135°F |
| Medium | 130°F to 135°F | 135°F to 140°F |
| Medium-Well | 140°F to 145°F | 145°F to 150°F |
| Well-Done | 150°F to 155°F | 155°F to 160°F |
Searing for a Crispy Crust
- Heat the pan: While the steak finishes cooking in the oven, place a cast iron pan on the stove and heat it over high heat.
You want the pan to be smoking hot. This will give the steak its crispy, golden crust. - Sear the steak: Take the steak out of the oven and put it in the hot pan.
Sear each side for 1-2 minutes. You’ll hear a loud sizzle, and the crust will form quickly.
If you like, add the butter, garlic, and herbs to the pan while searing. Spoon the melted butter over the steak for extra flavor.
Let the Steak Rest
- Rest the steak: After searing, remove the steak from the pan and let it rest on a cutting board for at least 5 minutes.
This step allows the juices to redistribute inside the steak, making each bite tender and juicy.
Serving Tips
Serve your reverse-seared New York strip with your favorite sides like mashed potatoes or roasted vegetables.
A simple salad can add a refreshing balance to the meal.
Pair it with a full-bodied red wine like Cabernet Sauvignon for the perfect steakhouse experience at home.
Pro Tip:
Love this recipe?
My Beef Secrets Cookbook includes over 100 recipes for perfect steak and other beef dishes.
Learn how to master every cut with easy, foolproof guides! Grab your copy now.
You might like this related article: New York Strip vs Ribeye
Your steak’s looking great,
but to get that perfect level of doneness,
it’s very important to know the right internal temperature.
Let’s talk about how to get it just right,
and then we’ll talk about some common mistakes to avoid,
as well as some wine pairings and side dishes you can use.
Ideal Cooking Temps for Reverse Sear
Best Internal Temp for Reverse Sear
Getting the temperature right is key to the reverse sear method.
You want the steak cooked to the perfect doneness.
Whether you like it rare or well-done, knowing the best internal temp for reverse sear is what makes the difference.
Using a Meat Thermometer for Steak Temps
The best tool here is your meat thermometer. Stick it into the thickest part of the steak.
Make sure you are not touching the bone if your steak has one.
You want the internal temp to be just right before you take it out of the oven.
After you sear the steak, the temperature will rise a little more.
Here’s a steak doneness chart you can use. It shows the right temps for each level of doneness.
These reverse sear steak temps will help you get it perfect every time.
| Doneness | Internal Temp Before Searing | Final Temp After Searing |
|---|---|---|
| Rare | 115°F to 120°F | 120°F to 125°F |
| Medium-Rare | 120°F to 125°F | 130°F to 135°F |
| Medium | 130°F to 135°F | 135°F to 140°F |
| Medium-Well | 140°F to 145°F | 145°F to 150°F |
| Well-Done | 150°F to 155°F | 155°F to 160°F |
Use this chart as your guide. Check the temp while the steak is in the oven.
Make sure it’s 10 to 15 degrees lower than your final goal. The sear will raise the temp to the perfect level.
Why These Temps Matter
The inside of your steak needs to be just right.
You don’t want a cold center or an overcooked piece of meat.
Using a thermometer makes sure you get it perfect every time.
Once you get the hang of it, you won’t need to guess.
The reverse sear steak temps are your key to mastering this method.
It’s easy, and it makes sure your steak is cooked the way you like it.
So now, you’ve got the perfect temp,
but before you plate up,
let’s make sure you avoid a few common mistakes that could ruin your hard work…
Common Mistakes to Avoid When Reverse Searing
Reverse Searing Mistakes to Watch For
Even with the reverse sear method, mistakes can happen. Don’t worry. It’s easy to fix them.
Here are the most common reverse searing mistakes you should avoid.
Avoid These Mistakes
One big mistake is over-searing. You don’t want to leave the steak in the pan too long.
If you do, the outside burns while the inside stays fine. When you sear, the pan should be very hot.
But you only need about 1-2 minutes per side. If you go longer, you risk burning it.
Another mistake is not seasoning the steak enough.
Salt and pepper are your best friends. Don’t hold back. Season both sides of the steak.
This will give you flavor inside and out. When you sear the steak, that seasoning helps form a tasty crust.
Skipping the resting period is also a big error.
After you finish searing, the steak needs to rest for at least five minutes.
If you skip this, the juices inside the steak will run out when you slice into it.
Resting keeps those juices inside the meat. When you cut it, the steak stays juicy.
It’s a small step, but it makes a huge difference.
Reverse Sear Steak Tips for Success
Here are a few reverse sear steak tips to help you avoid these mistakes next time.
First, watch the clock when you’re searing.
Don’t leave the steak in the pan too long. Second, always season generously.
You want every bite to have flavor. And last, let the steak rest. It’s simple, but it keeps the steak juicy and perfect.
Pro Tip:
Struggling to hit the right temperature? Try our Beef Temperature Calculator.
It takes the guesswork out and helps you get that perfect steak, whether you’re going for medium-rare or well-done.
The calculator gives you precise temperatures and cooking times for every cut of beef, so you always get perfect results.
Now that you know how to avoid the most common mistakes,
let’s take this steak dinner to the next level with some amazing sides and pairings…
Sides and Pairings for Your Reverse-Seared New York Strip
Best Side Dishes for Steak
Your reverse sear New York strip dinner is almost complete, but you need the perfect sides.
Keep it simple.
You don’t want the sides to take away from the steak.
Roasted vegetables work well. You can toss them with a little olive oil and salt.
Throw them in the oven while your steak is cooking. They come out tender with a slight crisp.
You can also make mashed potatoes. They’re creamy and pair perfectly with a juicy steak.
Add butter and garlic to take them up a notch.
Another easy side is a green salad. It adds freshness to the plate.
Toss some leafy greens with a light vinaigrette. It balances out the rich steak.
All these sides are easy to make. You don’t need any special ingredients or tools.
Wine Pairings for New York Strip
Let’s not forget the wine. The right wine makes your steak dinner feel complete.
A full-bodied red wine works best. You want something bold to match the flavor of the steak.
A Cabernet Sauvignon or a Malbec will do the job.
Their strong flavors pair well with the crispy crust and juicy meat of the reverse-sear New York strip.
If you want something lighter, a Merlot works too.
It’s smooth and won’t overpower the steak. Just pour a glass, and enjoy.
Keep It Simple
When choosing sides, remember to keep it simple. You don’t need a complicated dish to go with your steak.
Roasted veggies, mashed potatoes, or a salad will elevate the meal without too much effort.
The wine is a bonus. Pick what you enjoy, and you’ll have a perfect dinner.
Now you’ve got everything you need for a mouthwatering reverse-seared New York strip,
Complete with sides and pairings.
It’s time to fire up the oven and enjoy a steakhouse-quality meal right at home!
Comparing Other Cooking Methods to Reverse Searing
When it comes to cooking a New York strip, reverse searing is often the go-to method for those who want control over every step.
But how does it compare to other popular techniques?
Whether you’re pan-searing, grilling, or even using sous vide, each method has its pros and cons.
Let’s dive into the differences, rank these methods by difficulty, and see why reverse searing stands out, especially for beginners.
This will help you find the best way to cook your steak, no matter your skill level.
1. Reverse Searing (Oven + Pan)
This is the traditional reverse sear method.
Difficulty Level: Easy to Moderate
Pros:
- Slow, even cooking in the oven before searing ensures control over doneness.
- Best for thicker steaks like New York strip.
- You get a juicy inside with a crispy, golden crust.
Cons:
- Takes longer since you cook the steak at a low temperature first.
- Requires using both the oven and a pan.
Why It’s Great:
Reverse searing is ideal for beginners because it gives you time. The steak cooks evenly, so you don’t need to rush. The searing step locks in the flavor and creates that delicious crust.
2. Sous Vide + Sear
A variation of reverse searing using sous vide for the slow cooking part.
Difficulty Level: Easy
Pros:
- Guaranteed precise doneness due to the controlled temperature in the water bath.
- You can cook thick steaks like New York strip to perfection.
- Almost impossible to overcook.
Cons:
- Requires sous vide equipment, which not everyone has.
- Lacks the deeper flavor you get from the oven or pan alone, so the sear step is crucial.
Why It’s Beginner-Friendly:
With sous vide, the steak cooks slowly in a water bath set to an exact temperature. After that, you just sear it in a hot pan to add a crispy crust. It’s almost foolproof, making it a great option for those who want an easier, more controlled version of reverse searing.
3. Traditional Pan-Searing
Not reverse searing. This is direct high-heat searing without the slow cooking step.
Difficulty Level: Moderate
Pros:
- Fast and effective for thin to medium cuts.
- Only requires one pan, so it’s easy equipment-wise.
Cons:
- Harder to control doneness, especially for thick steaks like the New York strip.
- You can overcook the outside before the inside is done.
Why It’s Tricky:
Pan-searing works best for those who are experienced with heat management. The steak cooks fast, but timing is key. It’s harder for beginners because the heat can easily burn the outside while the inside remains undercooked. There is less control compared to reverse searing.
4. Grilling
Not reverse searing. Grilling involves cooking with direct heat over a flame.
Difficulty Level: Moderate to Hard
Pros:
- Adds smoky flavor from the grill, which enhances the steak.
- Great for outdoor cooking and thick steaks like New York strip.
Cons:
- Harder to control the temperature, especially with charcoal.
- Can result in uneven cooking, especially for thick steaks.
Why It’s Different:
Grilling provides a delicious smoky flavor but is harder to manage. Heat fluctuates, especially on charcoal grills, so the steak might cook unevenly. For those who love grilling, it works well but requires more experience and precision. Grilling lacks the slow control of reverse searing.
5. Broiling
Not reverse searing. Broiling uses high heat from above to cook quickly.
Difficulty Level: Hard
Pros:
- Fast, especially for thinner steaks.
- Broilers are widely available in most kitchens.
Cons:
- Hard to control. The steak can burn easily since the heat is so concentrated.
- Uneven cooking, especially for thick steaks like New York strip.
Why It’s the Hardest:
Broiling can cook steaks quickly, but it’s difficult to manage because the heat only comes from above. The steak can burn on the top before it cooks through. For thick steaks like New York strip, this method isn’t ideal.
Revised Ranking (Focusing on Reverse Searing and Comparisons):
- Reverse Searing (Oven + Pan) – Ideal balance of control and flavor for beginners.
- Sous Vide + Sear – Another reverse sear-like method with great precision.
- Traditional Pan-Searing – Requires more attention and timing, harder for thick cuts.
- Grilling – Adds flavor but is harder to control, especially with thick steaks.
- Broiling – Fast but difficult to get right for thicker steaks like the New York strip.
What Compares to Reverse Searing?
For beginners, reverse searing and sous vide + sear offer the most control.
You get a juicy inside and crispy outside without worrying about overcooking.
Pan-searing and grilling are faster but less forgiving, while broiling can be difficult to manage for thick steaks like the New York strip.
Resources
- Serious Eats – Serious Eats provides a comprehensive guide on the reverse sear technique, detailing its benefits and offering step-by-step instructions.
- America’s Test Kitchen – America’s Test Kitchen features detailed instructions and insights into the reverse sear method, emphasizing its effectiveness.
- Bon Appétit – Bon Appétit discusses various cooking methods, including reverse searing, with expert tips and recommendations.
Martha Stewart Cookware – Comprehensive Guide
Introduction
Martha Stewart Cookware: A Legacy of Style and Substance
Martha Stewart’s brand, well-known and respected, shines in every kitchen. It’s a mark of quality, style, and innovation. Her cookware? It’s a game-changer.
The Right Cookware Makes All the Difference
Choosing the right tools? It’s essential. Good cookware means evenly cooked meals. Martha’s line offers that and more. You cook better, your meals taste great, and isn’t that just perfect?
Overview of Martha Stewart Cookware
History and Evolution
Martha Stewart first launched her cookware line in the early 90s.
It began with a simple vision: make quality, accessible. Since then, her brand has soared, bringing innovation into kitchens everywhere.
Milestones?
There are plenty.
The introduction of eco-friendly materials, the expansion into global markets, and countless design awards.
Each step marked her commitment to better cooking, at home.
Range of Products
Martha’s cookware? It offers variety. Pots, pans, baking dishes, and more.
Each piece tailored for specific culinary tasks.
Got a recipe in mind? There’s a Martha Stewart tool for it.
Special features stand out, too. Think non-stick surfaces, perfect for easy cleaning.
Oven-safe capabilities?
Yes, they handle heat like a champ. Cooking becomes simpler, quicker, and way more fun.
Features and Benefits
Material Quality
Martha’s cookware uses top-notch materials. Think stainless steel, ceramic.
These choices aren’t just chic; they’re practical. They heat evenly, resist wear, and last. Ready for years of cooking adventures.
Design and Aesthetics
It’s about style, too. Martha’s pieces shine in any kitchen. Available in various colors, finishes.
They’re more than cookware; they’re part of your kitchen decor. A feast for the eyes, truly.
Compatibility and Convenience
Flexibility? Check. These pots and pans work with gas, induction, electric.
Cleanup’s a breeze too, thanks to dishwasher-safe designs.
Cooking and cleaning simplified, just like that.
Buying Guide
Where to Buy
Looking for Martha Stewart cookware? It’s easy.
Start at Amazon.com, Macy’s, and Wayfair. Don’t miss Martha’s own site too, great exclusives there.
For deals? Check out Black Friday sales, and seasonal promotions. Also, subscribe to newsletters, snag those discount codes.
Top Picks for Martha Stewart Cookware
1. Martha Stewart 10-Piece Stainless Steel Set This set packs essentials. You get frying pans, saucepans, and a Dutch oven. Ideal for all-around cooking!
2. Martha Stewart Lockton 10-Piece Nonstick Set Features include a ceramic nonstick interior, enamel exterior, and riveted gold handles. It includes pots and pans in various sizes for versatile cooking (Top Cookware Brands).
3. Martha Stewart 12-Piece Hard Anodized Set This collection includes multiple saucepans, frypans, and a stockpot. It’s designed for various cooking methods and is induction ready (Merchostore.com).
4. Martha Stewart Lockton 12″ Multipurpose Frypan/Wok Just one piece, but it’s a standout. Perfect for everything from frying eggs to stir-frying veggies (Merchostore.com).
5. Martha Stewart Lockton 10-Piece Premium Set This set includes pots and pans made of heavy-gauge aluminum with a ceramic interior and enamel exterior. It combines practicality with style (Wayfair).
Each option brings something special, like easy cleanup or even heating. They are awesome for any kitchen update!
Price Range
Options abound, from budget-friendly to high-end. Entry models won’t break the bank.
Premium lines? They compare well with other top brands.
For value, Martha’s is tough to beat.
Quality? Top-notch, without the steep price tag.
Martha Stewart Cookware Pricing Overview
Martha Stewart Cookware Price Range: Prices start around $25 for a basic pot. A 10-piece set might cost $100 to $200. A 5-quart Dutch oven sells for about $40, quite affordable for its quality and versatility (Mashed).
Comparison with Other Brands
Le Creuset: This brand’s premium enameled cast iron cookware is much pricier. A small Dutch oven starts at about $180, and larger items may exceed $500. They offer great heat retention and vibrant colors but come at a high cost (Ralph’s Way).
Rachael Ray: Her cookware is generally more affordable or on par with Martha Stewart’s prices. It features vibrant, modern designs and good functionality, aimed at home cooks seeking style and practicality (differencesonly.com).
GreenLife Comparison: Martha Stewart’s cookware often uses stainless steel and hard-anodized aluminum, similar to Rachael Ray. GreenLife opts for ceramic non-stick surfaces at competitive prices. All three brands are dishwasher safe and have similar oven-safe temperatures, suitable for daily cooking (https://healthyceramiccookware.com).
Conclusion
Martha Stewart cookware strikes a balance between quality and affordability. It suits casual cooks and those who prefer classic designs.
Le Creuset caters to those needing high performance at a higher cost.
Rachael Ray provides colorful, budget-friendly options.
Martha Stewart fits well for those seeking reliable, stylish cookware at mid-range prices.
Internal Temp for Medium Ribeye Steak: The Perfect Guide to Juicy Results Every Time
What’s the Ideal Internal Temp for Medium Ribeye?
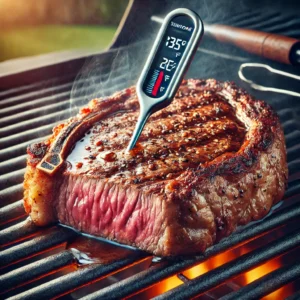
Alright, so you want your ribeye cooked just right, right? The internal temp for medium ribeye steak is the magic number. You’re aiming for 135°F. That’s what gives you that nice pink middle. It stays juicy. It’s not dry.
Now, don’t guess. Get yourself a thermometer. Just stick it in the thickest part of the steak. Avoid the bone and the fat. You’re after the meat. When it hits 135°F, you’re golden. Pink inside, crispy on the outside.
Picture cutting into that ribeye. Juices dripping. The middle is that perfect shade of pink. That’s what you’re going for. Here’s a tip: take the steak off the heat a bit before it hits 135°F. Let it rest. It’ll keep cooking while it sits, and you’ll get it just right.
Next, let’s talk about why that temp matters so much. You can’t always tell by just looking at the outside of the steak.
Why Internal Temp Matters in Steak Cooking
When cooking a steak like ribeye, getting the internal temp for medium ribeye steak right changes everything.
You know how sometimes you cut into a steak, and it’s overcooked or too rare?
That happens when you don’t check the temp. With ribeye, the medium ribeye steak temperature is key to getting that juicy center.
If the temp goes too high, it dries out. You’ve got a dry steak. Not what you want.
The medium steak temp ribeye is that sweet spot where it’s tender but still has a nice crust on the outside.
Hitting that 135°F keeps it perfect inside. Pink, warm, and just the way it should be.
Think of the difference it makes. At the right temp, the flavors pop.
The fat melts into the meat. But go past that temp, and the magic’s gone.
You end up with chewy and tough. So, checking the temp isn’t just a step. It’s the secret to nailing a perfect ribeye.
Next, let’s break down how you can check the temperature and make sure you hit that sweet spot every time.
How to Check Internal Temp for Medium Ribeye
So you’re cooking your ribeye and need to know when it’s perfect. The medium steak temp ribeye is around 130°F to 135°F.
This range gives you that warm pink center. It’s all about using a meat thermometer. Guessing just won’t work.
First grab your thermometer. Stick it into the thickest part of the ribeye.
Make sure you avoid the bone or any big chunks of fat. You want to measure the meat and nothing else.
If the number reads 130°F to 135°F you’re good. This is the best temp for medium ribeye.
Now you might wonder why this matters. Here’s why.
If you don’t check the temp you’ll risk undercooking or overcooking. Undercooked steak can be too rare for most people.
And overcooked?
Well you lose all the juices and the steak gets tough. Nobody wants that.
After checking the temp let the ribeye rest for about five minutes. It keeps cooking as it sits. The juices stay inside making each bite better.
But what if you prefer your ribeye a little more rare or well-done?
Knowing the right internal temp for your preferred doneness can make all the difference.
Below is a quick guide to help you hit the best internal temp for medium ribeye steak and every level of doneness, from rare to well-done.
| Steak Doneness | Internal Temperature | Description | Texture | Flavor Profile | Cooking Tip |
|---|---|---|---|---|---|
| Rare | 120°F to 125°F | Cool red center | Very soft, almost raw | Rich, beefy flavor, minimal fat rendering | Sear quickly at high heat for a nice crust without overcooking. Ideal for steak lovers who enjoy a more raw texture. |
| Medium-Rare | 125°F to 130°F | Warm red center | Tender, juicy | Slightly more balanced fat rendering, rich and juicy | Most recommended doneness for ribeye. Sear both sides and cook for a bit longer to reach the perfect internal temp. |
| Medium | 130°F to 135°F | Warm pink center | Firm, still tender | Good fat melt, juicy, balanced flavor | For best results, take the ribeye off the heat at 130°F and let it rest for 5 minutes to achieve this temp. |
| Medium-Well | 135°F to 145°F | Slightly pink center | Slightly firm, less juicy | Mild, less rich as fat renders out | Lower the heat after searing to avoid overcooking and drying out. Resting becomes more critical at this stage. |
| Well-Done | 145°F and above | No pink, gray-brown throughout | Firm, dry | Least juicy, fat fully rendered | Cook slowly at low heat after searing to ensure it’s cooked through without burning. |
Pro Tip:
Want to make sure your steak hits that perfect 130°F to 135°F for medium?
Don’t guess— Use our Beef Temperature Calculator Just input your cut of meat and desired doneness, and it will guide you to the exact internal temperature.
Say goodbye to overcooked steaks and dry bites—just click the link and get it right every time!
Next we’ll go over some steps to make sure you get the best medium ribeye every single time. It’s all about technique and timing.
Step-by-Step Guide: Cooking the Perfect Medium Ribeye
Now it’s time to cook that ribeye just right. Cooking ribeye medium means you need to follow some key steps to hit that sweet spot. You want the outside crispy and the inside warm and pink. Here’s how to do it.
1. Prep the Ribeye
Take the steak out of the fridge and let it sit for about 30 minutes. You want it at room temp before cooking. This helps it cook evenly. Season both sides with salt and pepper. Simple is best here. Ribeye has its own rich flavor.
2. Sear the Steak
Heat up your pan or grill until it’s really hot. You want a good sear. Place the ribeye on the pan or grill. Cook each side for about three to four minutes. You’ll get a nice brown crust. Don’t press down on the steak. Let it sit and do its thing.
3. Move to Indirect Heat
Once both sides have a good sear it’s time to move the steak to lower heat. This part finishes cooking ribeye medium. If you’re using a grill move the steak to the cooler side. If using a pan turn down the heat. Cook for another five to seven minutes. Use a thermometer to check the medium ribeye steak temperature. You’re aiming for 130°F to 135°F.
4. Rest the Steak
Once you’ve hit the best temp for medium ribeye take it off the heat. Now let it rest for about five minutes. The steak will keep cooking as it rests and the juices will stay inside. This step is key to keeping your ribeye juicy.
Now you know the basics of cooking ribeye medium. Next let’s talk about a tool that can help you make sure your steak is always perfect. The beef temperature calculator makes it easy.
Using the Beef Temperature Calculator from ChefCrown.com
When you’re cooking steak you don’t want to guess. That’s where the beef temperature calculator comes in handy.
It’s a simple tool that takes the guessing out of cooking. You just plug in the cut of meat and how you want it cooked.
It will tell you the exact temp to aim for.
Say you’re making ribeye. You type in “ribeye” and select “medium.” The calculator will show you the ribeye medium internal temperature right away. That’s 130°F to 135°F.
No more second-guessing or worrying about overcooking. It’s all laid out for you.
The beauty of this tool is that it works for all kinds of beef cuts.
You can use it for everything from ribeye to sirloin to brisket. And it’s super easy to use.
The beef temperature calculator helps you nail the perfect temperature for medium ribeye every time.
You won’t have to worry about messing up that beautiful steak.
Want to try it out? Click here to get the right beef temperature. It’s fast it’s simple and it makes sure your steak is always on point.
Next up we’ll talk about the common mistakes people make when cooking ribeye and how to avoid them.
Common Mistakes to Avoid When Cooking Medium Ribeye
Cooking steak can seem simple but there are a few mistakes that can really mess up a ribeye.
Getting the internal temp for medium ribeye steak right is important but there are other things to watch out for too. Let’s go over some common pitfalls so you can avoid them.
1. Not Checking the Temp
Guessing the doneness of your ribeye is risky. You might think it looks done but inside it could be too rare or overcooked.
Always use a thermometer. The ribeye medium internal temperature should be between 130°F and 135°F. This keeps it juicy and pink in the middle.
2. Not Letting the Steak Rest
After cooking a ribeye you need to let it rest. A lot of people skip this part.
But if you don’t rest it the juices spill out as soon as you cut into it. Let it rest for about five minutes.
The juices will stay inside and make each bite tender and full of flavor.
3. Using the Wrong Heat Level
Searing the steak on high heat is great for a crust but then you need to lower the heat.
If you cook the whole steak on high heat it will burn on the outside before the inside reaches the medium steak temp ribeye.
After searing move it to indirect heat or turn the heat down.
4. Pressing the Steak Down
When cooking ribeye avoid pressing it down with a spatula or tongs. A lot of people do this thinking it will cook faster.
But pressing squeezes out the juices and dries the steak out. Let it sit and cook naturally.
These mistakes can ruin your ribeye but now you know how to avoid them.
Next let’s wrap things up and talk about why getting the temperature right is so important for a perfect steak.
Wrap-Up: Why the Right Temp Is Key to a Juicy Ribeye
So let’s bring it all together. Getting the internal temp for medium ribeye steak right is the secret to cooking a perfect steak.
It’s all about hitting that ribeye medium internal temperature of 130°F to 135°F.
That’s what gives you a steak with a warm pink center. Juicy tender and packed with flavor.
If you don’t check the temp you’re just guessing. And nobody wants to guess when cooking a steak.
Overcook it and you lose all those juices. Undercook it and it’s too rare. Using a meat thermometer makes sure you’re always spot on.
Plus with tools like the beef temperature calculator you don’t have to worry about getting it wrong. You just pop in the cut of meat and the doneness you want and it tells you the best temp for medium ribeye. Easy as that.
So next time you’re at the grill or stove. Grab your thermometer check the temp and let your steak rest.
You’ll have a ribeye that’s cooked perfectly every single time.
Now go ahead and give it a try. Your steak game just leveled up.
Related Posts You Might Find Interesting:
- Reverse Sear New York Strip: A Foolproof Guide
Learn how to perfectly cook a New York strip steak using the reverse sear method. This guide helps you get that juicy, evenly cooked steak every time. - How to Cook Ground Beef for Spaghetti
Discover the step-by-step guide for cooking ground beef perfectly for your spaghetti. Whether you’re a beginner or want to up your game, this is your go-to guide. - Gordon Ramsay Recipes
Explore the top 10 Gordon Ramsay recipes that are perfect for home cooks. Get ready to cook like a chef with these simple yet delicious recipes. - Gordon Ramsay Pans He Uses
Want to know which pans Gordon Ramsay uses in his kitchen? Find out here and elevate your cooking tools for better results. - New York Strip vs Ribeye: The Ultimate Showdown
Can’t decide between New York strip and ribeye? This post breaks down the differences so you can pick the perfect steak for your next meal. - Beef Temperature Calculator
Use the Beef Temperature Calculator to ensure your steak or ground beef is cooked just right. A must-have tool for all beef lovers.
Sources:
- USDA Guidelines on Safe Meat Cooking Temperatures
USDA – Safe Minimum Internal Temperatures
This page provides the official USDA guidelines on the internal temperatures needed for safely cooking beef, poultry, and other meats. - Serious Eats – The Food Lab: How to Cook Steak
Serious Eats – How to Cook the Perfect Steak
A well-known resource in the cooking world. Serious Eats provides detailed, science-backed methods for cooking steak, including tips on hitting the right internal temperature. - ThermoWorks – Guide to Steak Doneness
ThermoWorks – Internal Temps
ThermoWorks specializes in thermometers and temperature guides. This source breaks down steak doneness by temperature and explains how to use thermometers for perfect results.
New York Strip vs Ribeye: The Ultimate Steak Showdown
Two Steak Giants – New York strip vs Ribeye
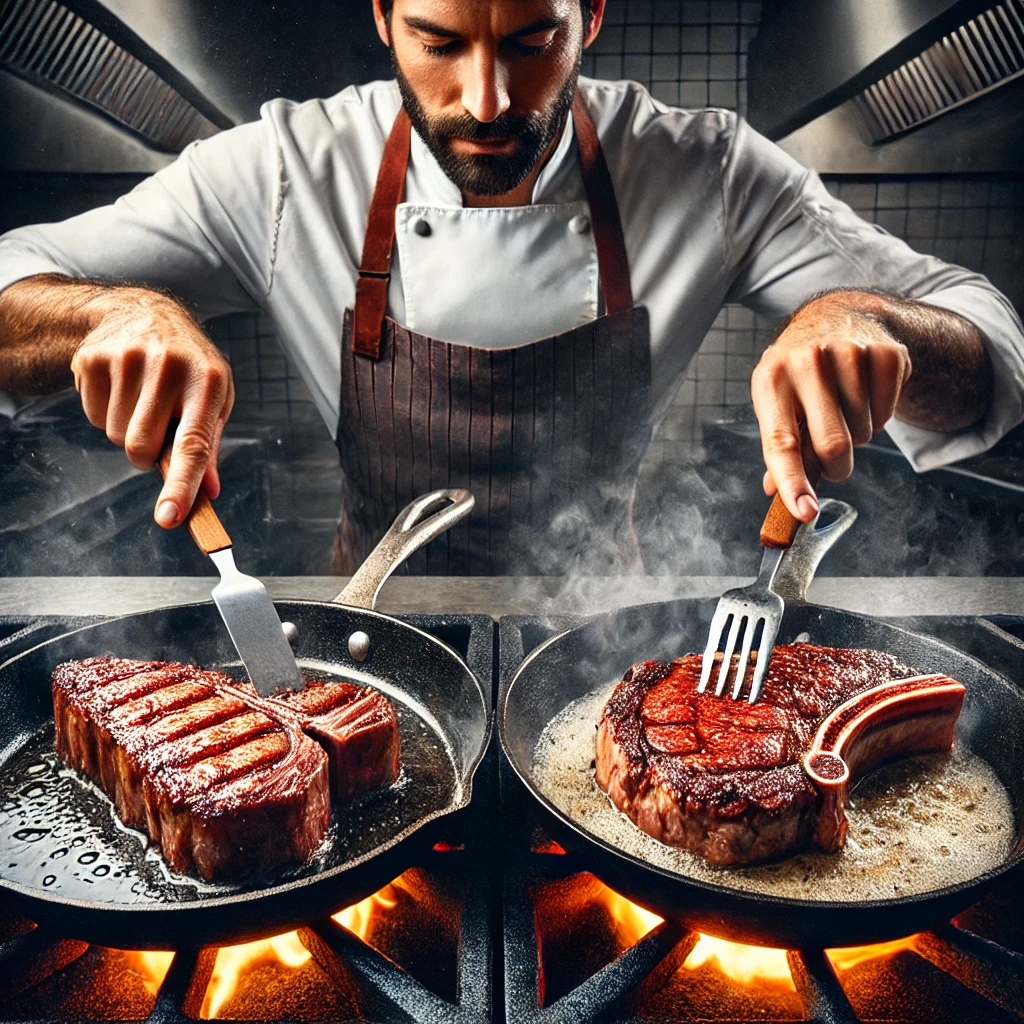
Steak lovers always talk about New York strip vs ribeye. These two cuts stand out. They’re popular for a reason.
They bring big flavor. But many people wonder, which one is better?
Imagine standing at the meat counter. You look at the New York strip. It’s firm. It has a clean edge.
The meat is lean. Next to it sits the ribeye. It’s different. You can see fat running through it. It looks juicy.
You might wonder, what’s the difference between New York strip and ribeye?
Maybe you’ve struggled to pick the best steak cut for grilling. That’s where this guide helps.
We’re going to break it all down.
We will compare taste. We’ll talk about nutrition.
We will even look at price.
You’ll know which steak is right for you by the end.
Let’s dive in.
Pro Tip:
Whether you’re grilling a rich, juicy ribeye or pan-searing a lean New York strip, hitting the right temperature is key to achieving the perfect steak.
Don’t leave it up to guesswork. Use our Beef Temperature Calculator to ensure your steak is cooked just the way you like it—whether you prefer medium-rare or well-done.
The calculator gives you precise temperatures and cooking times for every cut of beef, so you always get perfect results.
Taste and Texture: What to Expect
When you compare new york strip vs ribeye taste, you notice how different these two cuts really are.
Let’s dive deeper into what makes each one special.
Ribeye: Juicy and Rich
The ribeye steak is known for its fat. You see it marbled throughout the meat.
This fat melts as it cooks, making each bite juicy and full of flavor. That’s what gives the ribeye its rich taste.
When you take a bite, the steak feels soft. It’s almost like butter melting in your mouth.
The ribeye comes from the cow’s upper rib area.
It’s one of the most flavorful parts because the muscle here doesn’t do much work. This makes it tender.
The ribeye’s history goes way back. Cowboys loved cooking ribeye over open fires, and it’s been a favorite ever since.
This cut is perfect for anyone who craves a rich and indulgent steak.
If you like bold, buttery flavors, the ribeye taste will not disappoint.
It’s often considered the best steak cut for grilling because that fat helps it stay juicy even over high heat.
New York Strip: Lean and Bold
Now, let’s look at the New York strip. This steak is leaner.
You won’t find much fat inside the meat. Instead, you’ll see a strip of fat along the edge.
The meat itself is firm and gives you a nice, chewy bite.
This makes it different from the ribeye, which is softer.
The New York strip comes from the short loin of the cow.
This area is more muscular, which is why the steak has a firmer texture.
This cut has a long history, too. It got its name from steakhouses in New York City that made it famous.
It’s been a favorite in fancy restaurants for years.
Even though it’s leaner, the New York strip texture still delivers bold flavor.
It’s the steak for people who want something beefy and substantial.
If you’re not into too much fat but still want a tasty steak, this cut is your go-to.
Many love the New York strip for pan-searing because it holds up well under direct heat.
The Difference Between New York Strip and Ribeye
So, what’s the real difference between New York strip and ribeye?
It all comes down to fat and texture. The ribeye is rich and full of fat, while the New York strip is leaner and chewier.
The ribeye gives you a softer bite, and the fat brings a deep, buttery flavor.
The New York strip is firmer, but it has that classic steakhouse taste many love.
TIP: If you like your steak to melt in your mouth, go for the ribeye.
If you prefer a leaner, firmer steak that still packs flavor, the New York strip is your best choice.
Each steak has something unique to offer, and your decision depends on what kind of eating experience you want.
Nutrition: Which is Healthier?
If you care about what you eat then looking at ribeye vs New York strip nutrition is important.
Both taste great but they are different when it comes to fat and calories.
Let’s break it down.
Ribeye: Rich but High in Fat
The ribeye is packed with flavor because of the fat inside. This fat gives the steak a juicy taste but it also adds more calories.
You can see the fat marbled through the meat. It makes each bite rich. But this also means more calories in each bite.
A typical ribeye has more fat and more cholesterol. It’s great for a special treat but not the best if you want to eat lean.
Picture grilling a ribeye. The fat sizzles and pops on the grill.
The smell fills the air. It’s what makes ribeye special. But with all that flavor comes more fat.
New York Strip: Leaner and Lighter
Now look at the New York strip nutrition. This steak is much leaner. You won’t find much fat inside the meat.
Most of it stays on the edge. You can trim it off if you want to cut down on the extra calories.
The New York strip has fewer calories and less fat than the ribeye. This makes it the healthier choice if you want a lighter meal.
When you cook a New York strip you won’t hear as much sizzle.
That’s because there’s less fat. But don’t worry the flavor is still there. Each bite is beefy and satisfying without the extra heaviness.
Protein Power: Both Steaks Pack It
Both steaks are packed with protein. It’s good for building muscle and keeping you full.
The ribeye gives you more fat with the protein while the New York strip gives you more lean meat.
Healthy Steak Option: The Winner
So which steak is the healthy steak option?
If you want fewer calories and less fat the New York strip wins. It’s leaner. It has less fat.
It’s great for keeping your diet on track while still enjoying a good steak.
The ribeye gives you more fat and more flavor but it’s heavier. Perfect for a special meal but not as light as the strip.
Price Comparison: Which One Fits Your Budget?
When choosing between New York strip vs ribeye, price can be a big deal.
Let’s look at what makes these steaks cost different amounts and help you decide which one fits your wallet.
Ribeye: Rich Flavor Comes with a Cost
The ribeye is often more expensive. Why?
It’s all about the fat. That marbling gives it its rich flavor and juiciness. But with that fat comes a higher price.
You’re paying for the tenderness and the melt-in-your-mouth experience.
A typical ribeye steak price ranges from $12 to $16 per pound.
If you want a steak that feels like a treat, this might be worth the extra dollars.
Imagine going to the butcher and seeing that price tag. The ribeye looks tempting.
The fat running through the meat promises a juicy steak. But is it worth spending more?
For some people, it is. The flavor can’t be beaten. For others, they might want something more affordable.
New York Strip: Great Flavor at a Lower Price
The New York strip is usually a bit cheaper. It’s leaner.
It has less fat, which makes it more affordable. A typical New York strip cost falls between $10 and $15 per pound.
It’s a great steak for anyone who wants bold flavor without spending too much.
Picture this. You’re looking at the New York strip. It’s firm. It’s lean.
The price tag is lower, and it still promises a good steak experience.
This makes it a good choice for budget-conscious people.
You get a lot of flavor for less money.
Why the Difference in Price?
So why does ribeye cost more than New York strip?
It comes down to fat and texture. The ribeye has more marbling, which gives it a richer taste and higher price tag.
The New York strip is leaner, so it costs a bit less.
Both cuts are great, but the price can help you decide which one is right for your meal.
Average Price Comparison
Here’s a look at what you can expect to pay:
| Steak Type | Average Price Range (per pound) |
|---|---|
| New York Strip | $10 – $15 |
| Ribeye | $12 – $16 |
If you want a special meal and don’t mind spending more, go for the ribeye.
But if you’re looking for a great steak that doesn’t break the bank, the New York strip is the way to go.
Factors That Change the Price
A few things can change the price of these steaks. First, the quality grade matters.
Prime cuts are more expensive because they are higher quality.
Second, prices change based on where you live.
In some places, you can find New York strip for as low as $6 per pound.
Finally, if you eat out at a restaurant, be ready to pay more.
A ribeye might cost around $67 for a 16-ounce steak at a restaurant.
Best Cooking Methods for Each Cut
When it comes to cooking steak, the method is everything.
Whether you are grilling or using a skillet, the way you cook can make all the difference.
Let’s talk about the best steak cut for grilling and the right cooking method to get the best results.
Ribeye: Perfect for the Grill
The ribeye is made for the grill. Its fat melts as it cooks, adding juicy flavor throughout the steak.
The key to grilling ribeye is using high heat. This helps create a nice crust while keeping the inside tender.
How to Grill Ribeye
- Heat your grill to high. You want the temperature to be around 450°F to 500°F.
- Season your ribeye with salt and pepper or your favorite rub.
- Place the steak on the hot grill. Let it sear for 4 to 5 minutes on one side without moving it.
- Flip the steak and grill for another 4 to 5 minutes. This will give you a nice medium-rare steak. If you want it cooked more, leave it for another 2 to 3 minutes.
- Use a meat thermometer to check the internal temperature. You want it at 130°F to 135°F for medium-rare or 145°F for medium. For more accurate temperature readings, use our Beef Temperature Calculator to ensure perfect results every time.
- Let the steak rest for 5 minutes before slicing to keep the juices inside.
To make sure you hit this temperature, use our Beef Temperature Calculator and thermometer for foolproof results.
Common Ribeye Cooking Problems
- Problem: The steak is too fatty or greasy.
- Solution: Trim the outer fat before grilling. Don’t cut off all the fat, just the extra bits hanging on the edges.
- Problem: The outside burns before the inside is cooked.
- Solution: Lower the heat if it’s too high. Start with a sear and then move the steak to a cooler part of the grill to finish cooking.
New York Strip: Pan-Searing Perfection
The New York strip loves a hot skillet. This leaner cut develops a beautiful crust when seared on high heat.
Pan-searing gives you control, making sure you get a crispy outside and juicy inside.
How to Pan-Sear New York Strip
- Heat your skillet over high heat until it’s smoking hot. Add a tablespoon of oil with a high smoke point like canola or avocado oil.
- Season your New York strip with salt and pepper.
- Place the steak in the hot pan. Sear for 3 to 4 minutes without touching it.
- Flip the steak and cook for another 3 to 4 minutes for medium-rare. For medium, cook for 5 to 6 minutes on the second side.
- Add a tablespoon of butter along with a few garlic cloves and a sprig of thyme or rosemary. Tilt the pan and spoon the melted butter over the steak to add flavor.
- Check the internal temperature with a meat thermometer. For medium-rare, aim for 130°F to 135°F. For medium, shoot for 145°F. You can also use our Beef Temperature Calculator to get the ideal cooking time for your preferred doneness.
- Let the steak rest for 5 minutes before cutting.
To make sure you hit this temperature, use our Beef Temperature Calculator and thermometer for foolproof results.
Common New York Strip Cooking Problems
- Problem: The steak is too tough.
- Solution: Make sure to cook the steak to the right temperature. Overcooking can make it tough. Also, let the steak rest before cutting into it.
- Problem: The crust isn’t forming well.
- Solution: Make sure the skillet is hot enough. If it’s not smoking when you add the steak, you won’t get that crispy crust. Don’t move the steak too soon. Let it sit on one side long enough to form the crust.
Which Steak Should You Choose?
If you love grilling, go with the ribeye. Its fat melts into the meat, giving you a juicy and flavorful steak.
If you prefer stovetop cooking, the New York strip is your best bet.
The leaner cut develops a great crust when pan-seared. Each steak has its own style, so how you cook it matters.
Now, let’s talk about how Gordon Ramsay and Jamie Oliver like to do it…
Cooking Ribeye and New York Strip: Ramsay vs. Oliver
While Ramsay and Oliver don’t directly compare New York strip and ribeye steaks, their methods for cooking ribeye shine a light on how they handle these cuts.
Let’s dive into their approaches and see what makes their steak-cooking methods stand out.
Gordon Ramsay’s Ribeye Strategy
Ramsay often reaches for ribeye in his steak recipes.
His love for this cut comes from the fat marbling, which he claims adds incredible flavor and juiciness.
Here’s how he handles it:
- High Heat Sear: Ramsay always sears ribeye in a hot pan, ensuring the steak gets that caramelized crust.
- Generous Seasoning: He coats the ribeye with salt and pepper, making sure every side gets seasoned.
- Aromatics for Flavor: Ramsay uses thyme and garlic, tossing them into the pan to infuse more flavor into the steak.
- Medium-Rare Perfection: He prefers ribeye cooked to medium-rare, keeping it tender and juicy.
Jamie Oliver’s Ribeye Approach
Oliver also favors ribeye when cooking for groups, thanks to its large size.
Here’s what makes his method different:
- Using Rendered Fat: Instead of using oil, Oliver uses the ribeye’s own fat to cook the steak, saying it tastes better than other oils.
- Creative Seasoning: Oliver often adds flair with a spice rub. One of his favorite combos includes Szechuan pepper and Chinese five spice.
- Herbs and Aromatics: Like Ramsay, Oliver doesn’t hold back on rosemary and garlic, bringing out the best in the steak’s flavor.
- Aiming for Medium: Oliver typically cooks ribeye to medium, though he sometimes experiments with different styles, like his Chinese-style ribeye finished with chili, garlic, and ginger.
Ramsay’s New York Strip Technique
When it comes to New York strip, Ramsay brings a similar passion.
Here’s how he cooks it:
- Spice Rub Mastery: He presses a flavorful rub into the steak, often using ingredients like chipotle and coffee for a sweet, smoky, and spicy mix.
- Room Temperature Trick: Ramsay believes the key to a perfect New York strip is letting it rest at room temperature for about 10 minutes before cooking.
- Searing and Basting: He sears the steak with oil and aromatics like thyme and garlic, then finishes by basting it with the flavorful butter in the pan.
- Resting for Flavor: After cooking, Ramsay always rests his steak, allowing the juices to redistribute, making the steak more flavorful and tender.
Final Thoughts: Which Steak Is Best for You?
So you’ve learned all about New York strip vs ribeye. Now it’s time to decide. Which steak is better?
That depends on what you care about most.
Ribeye: For Those Who Crave Rich Flavor
If you love a juicy steak that feels rich and indulgent, the ribeye is your pick.
The fat marbling melts into the meat. It gives each bite a buttery flavor that stays with you.
This steak is for the person who wants to treat themselves. It’s the kind of steak you savor slowly.
Picture cutting into a ribeye fresh off the grill. The juices drip down your fork. Each bite feels like a reward.
New York Strip: Lean and Beefy
On the other hand, if you prefer something leaner but still packed with flavor, the New York strip is the way to go.
It doesn’t have as much fat, but it still gives you that strong beefy taste.
It’s firmer when you chew. You get a nice bite with every forkful.
It’s perfect for someone who loves steak but wants to keep things a bit lighter.
Imagine searing a New York strip on a hot skillet. The crust forms. You cut into it. It’s lean, bold, and satisfying.
Which Steak Is Better?
The answer to which steak is better depends on what you’re looking for.
If rich, juicy flavors win you over, then the ribeye is for you.
If you want something leaner but still full of flavor, then pick the New York strip.
Each steak brings something different to the table.
Choose the Best Steak Cut for You
When it comes to making the choice, think about what matters most to you.
Do you want rich flavor or a leaner bite?
Are you looking for a special treat or an everyday steak?
Both the New York strip and the ribeye are great choices. It’s all about what you enjoy more.
Whether you’re cooking a juicy ribeye or a lean New York strip, the right temperature is key.
Use our Beef Temperature Calculator to get your steak just the way you like it.
Pro Tip:
Whether you’re cooking a juicy ribeye or a lean New York strip, make sure it’s cooked to perfection with our Beef Temperature Calculator.
Sources:
- MasterClass – New York Strip vs. Ribeye: How Do They Compare?
This article provides an in-depth look at the flavor, texture, and nutrition differences between ribeye and New York strip steaks, as well as cooking tips for both cuts. Read more here - Steak University – New York Strip vs. Ribeye Steak Comparison
A detailed breakdown of the differences in flavor, texture, and cooking methods, along with nutritional information for ribeye and New York strip steaks. Chicago Steak Company
Beef Temperature Calculator: The Secret Tool to Perfect Steak Every Time

[wpcode id=”243″]
Disclosure: As an Amazon Associate, I earn from qualifying purchases.
How to Use the Beef Temperature Calculator: A Step-by-Step Guide

Cooking beef doesn’t have to feel tricky. With the Beef Temperature Calculator, you can skip the guesswork. This guide walks you through every step, so you’ll be grilling or roasting like a pro in no time.
Step 1: Will You Use a Meat Thermometer?
Got a meat thermometer? Awesome! If not, don’t sweat it. We’ve got you covered.
- Yes
- No
Why It Matters
A meat thermometer lets you know the exact inside temperature. This helps you get your beef cooked just right.
Tip: Use a meat thermometer if you have one. It removes the guesswork.
Perfect Your Steak with This Wireless Meat Thermometer
Step 2: Choose Your Doneness Level
How do you like your steak? Rare and juicy? Or maybe well-done with no pink? Pick your favorite doneness level.
- Rare
- Medium Rare
- Medium
- Medium Well
- Well Done
Understanding Doneness Levels
- Rare: Cool red center
- Medium Rare: Warm red center
- Medium: Warm pink center
- Medium Well: Slightly pink center
- Well Done: Little to no pink
Tip: Think about your taste or who you are cooking for. People prefer different doneness levels.
Step 3: Select Your Beef Cut
What cut are you cooking tonight? Ribeye, filet mignon, or maybe some ground beef for burgers? Choose the cut that fits your recipe.
- Filet Mignon
- Ribeye
- Sirloin
- New York Strip
- T-Bone
- Porterhouse
- Flank Steak
- Skirt Steak
- Roast
- Brisket
- Ground Beef
Choosing the Right Cut
Each beef cut brings something different to the table. Filet mignon is tender and lean, while ribeye packs big, rich flavor. Choose the cut that matches your mood.
- Filet Mignon: Tender and lean
- Ribeye: Rich and flavorful
- Sirloin: Lean but full of flavor
- New York Strip: Firm with tenderness
- T-Bone and Porterhouse: A mix of tenderloin and strip steak
- Flank and Skirt Steak: Thin cuts perfect for marinating
- Roast and Brisket: Best for slow cooking
- Ground Beef: Great for burgers and other dishes
Tip: Pick a cut that works with your recipe and method.
Step 4: Select How You’ll Measure
Time to measure! Whether you go by thickness or weight, the calculator will handle the hard part for you.
- Thickness: Ideal for steaks and smaller cuts
- Weight: Best for big cuts like roasts and briskets
Tip: Accurate measurements help with even cooking.
Step 5: Enter Thickness or Weight
If You Chose Thickness
- Measure with a ruler or tape
- Measure the thickest part
- Enter the thickness you measured
- Pick the unit (Inches or Centimeters)
Example: If your steak is 2 inches thick, enter “2” and pick “Inches.”
If You Chose Weight
- Check the package or use a kitchen scale
- Enter the beef’s weight
- Pick the unit (Grams, Kilograms, Pounds, or Ounces)
Example: If your roast weighs 3 pounds, enter “3” and pick “Pounds.”
Tip: Be precise. It affects cooking time.
Step 6: Choose Your Cooking Method
How are you cooking it? Grilling, pan-searing, or maybe roasting? Pick your favorite method, and the calculator will adjust everything.
- Grilling
- Pan-Searing
- Roasting
- Broiling
Understanding Cooking Methods
Grilling
- Best For: Ribeye, sirloin, T-bone, burgers
- How It Works: High heat cooks from below
- What It Does: Grilling gives you that perfect sear on the outside and keeps all the juices inside. It’s all about the flavor!
Tips:
- Preheat the grill for even cooking.
- Oil the grates so the beef won’t stick.
- For steaks, use direct heat to get a good crust.
Pan-Searing
- Best For: Filet mignon, New York strip, thin cuts
- How It Works: High heat in a pan forms a golden crust
- What It Does: Pan-searing caramelizes the outside for rich flavor while keeping the inside tender.
Tips:
- Use a cast-iron pan for even heat.
- Heat oil until it shimmers to ensure the pan is hot enough.
- Don’t crowd the pan. Let each piece brown well.
Roasting
- Best For: Roasts and large cuts like prime rib
- How It Works: Uses dry heat in an oven to cook the beef evenly
- What It Does: Roasting gives a caramelized crust while keeping the beef tender inside. Slow roasting melts the connective tissue, making the meat juicy.
Tips:
- Preheat the oven for a steady temperature.
- Use a roasting pan with a rack for even air circulation.
- Let the meat rest after cooking. Juices will spread through the meat.
Broiling
- Best For: Thin cuts, flank steak, ground beef patties
- How It Works: High heat from above quickly sears the surface
- What It Does: Broiling gives the beef a crisp, browned crust while keeping the inside moist.
Tips:
- Place the beef close to the heat source for maximum browning.
- Keep a close eye on the beef to avoid burning. Broiling happens fast.
- Flip if needed for even cooking on both sides.
Tip: The right method depends on the cut and the outcome you want.
Step 7: Set the Starting Temperature
Is your beef straight from the fridge, or has it been sitting out? This matters for cooking times, so be sure to choose the right option.
- Refrigerated: Beef from the fridge
- Room Temperature: Beef that has been out for 30 minutes
Why It Matters
Room temperature beef cooks more evenly.
Step 8: Choose Temperature Unit
Select how you will measure the temperature.
- Fahrenheit (°F)
- Celsius (°C)
Tip: Use the unit your thermometer measures or the one you know best.
Step 9: Calculate the Cooking Time
Now for the fun part—hit Calculate and let the magic happen!
What You’ll Get
- Desired Doneness Temperature: The internal temperature your beef should reach.
- Estimated Cooking Time: How long it takes to cook your beef.
- Estimated Cooking Time per Side: For cuts that need flipping.
- Doneness Indicators: Clues to tell if the beef is done without a thermometer.
- Resting Time: The time you should let your beef rest before serving.
Tip: Write down the times or set a timer.
Step 10: Cook the Beef
Follow the calculated times and temperatures and you’re on your way to perfectly cooked beef!
If You’re Using a Meat Thermometer
- Insert it into the thickest part of the beef.
- Don’t touch bone or fat.
- Cook until the beef reaches the desired temperature.
If You’re Not Using a Thermometer
Learning how to check the doneness of beef by touch takes practice. But once you master it, you can cook beef perfectly even without a thermometer.
Perfect Your Steak with This Wireless Meat Thermometer
Here’s a step-by-step guide to help you feel your way through the different levels of doneness.
Rare: Soft and Squishy
-
-
- What It Feels Like: Rare beef is very soft and squishy. When pressed, it offers little resistance, almost like raw meat.
- How To Check:
- Hold your hand flat.
- With your other hand, press the fleshy part of your palm just below your thumb. When your hand is relaxed, this part feels very soft and squishy, just like rare beef.
- What You’ll See: When you cut into rare beef, the center will be bright red and cool to the touch. Juices will be red and plentiful.
- Why This Works: Rare beef is mostly uncooked in the middle, so it retains that soft, raw texture. Your hand mimics this by being loose and relaxed, showing the same softness you’ll feel in the meat.
-
Tip: Rare is best for those who like their beef very tender with a cool, red center.
Medium Rare: Soft with Some Resistance
-
-
- What It Feels Like: Medium rare beef is soft but starts to offer a bit of resistance when pressed. It still feels tender but not as soft as rare.
- How To Check:
- Hold your hand flat and gently bring your thumb and index finger together.
- Press the fleshy part of your palm below your thumb. It should feel soft but with a slight bounce. This is how medium rare beef feels.
- What You’ll See: The center will be warm and red, with slightly pink juices. The beef will still be tender, but firmer than rare.
- Why This Works: Medium rare beef starts to cook through the middle but still retains tenderness. The light pinch of your thumb and index finger creates the perfect balance of softness with a little firmness, matching the texture of medium rare beef.
-
Tip: Medium rare is great if you like a warm, red center with a slightly firmer texture.
Medium: Firm with Some Give
-
-
- What It Feels Like: Medium beef feels firmer but still has some give. It’s in the middle between soft and firm.
- How To Check:
- Make a loose fist with your hand. Don’t squeeze tightly—just lightly close your fingers into your palm.
- Press the base of your thumb. It should feel firm but still have some softness. This is what medium beef feels like.
- What You’ll See: The center will be pink and warm. Juices will mostly be clear with a bit of pink.
- Why This Works: Medium beef is cooked through more but still holds some juiciness. Your hand, when in a loose fist, mimics this level of firmness—it’s mostly firm with a little give, just like the beef at this stage.
-
Tip: Medium is a great choice if you like your beef tender but with more cooking.
Medium Well: Firm with Slight Give
-
-
- What It Feels Like: Medium well beef is much firmer with only a slight amount of give. It’s almost fully cooked.
- How To Check:
- Bring your thumb and middle finger together, making a light pinch.
- Press the base of your thumb. It should feel very firm, with just a tiny bit of give. This is how medium well beef feels.
- What You’ll See: The beef will have a slightly pink center, but most of the meat will be cooked through. Juices will run clear.
- Why This Works: Medium well beef is nearly cooked all the way through, but it retains a slight tenderness. Your hand, in a pinch between the thumb and middle finger, matches this firmness with just a little softness left.
-
Tip: Medium well is ideal if you like beef that’s almost fully cooked but still holds some juice.
Well Done: Very Firm with No Give
-
-
- What It Feels Like: Well done beef feels very firm when pressed. It has no give, meaning it’s fully cooked through.
- How To Check:
- Make a tight fist with your hand.
- Press the base of your thumb. It should feel hard, with no softness at all. This is how well done beef feels.
- What You’ll See: The center will be fully cooked, with no pink. Juices will run clear.
- Why This Works: Well done beef is cooked all the way through, leaving it very firm. The tightness of your fist creates the same firm texture you’ll feel in the meat.
-
Tip: Well done beef is perfect for those who prefer their meat fully cooked with no pink inside.
Why This Method Works
Your hand is a natural guide to understanding the textures of beef as it cooks. The changes in firmness and give in your palm mimic how beef transforms with heat.
By practicing the touch method, you’ll start to recognize these differences and be able to check your beef’s doneness confidently without a thermometer. Remember to check early to avoid overcooking!
Perfect Your Steak with This Wireless Meat Thermometer
Step 11: Let the Beef Rest
Let your beef rest for at least 3 minutes—it’s tempting, but trust us, it’s worth the wait. The juices will spread, making every bite juicy.
Why Resting Matters
Resting lets the juices move through the meat again. This makes the beef juicier and more flavorful.
Tip: Cover it loosely with foil to keep warm while it rests.
Step 12: Serve and Enjoy
Slice the beef against the grain for tenderness. Pair it with your favorite sides.
Tip: A sharp knife makes cutting easy.
Additional Tips for Success
- Season Well: Salt and pepper go a long way. Add herbs and spices for extra flavor.
- Preheat Your Equipment: Make sure your grill, pan, or oven is hot before you start cooking.
- Don’t Flip Too Often: Let the beef cook on one side before turning.
- Use the Right Tools: Tongs are better than forks to avoid piercing the meat.
- Clean Your Grill or Pan: This prevents sticking and ensures even cooking.
Frequently Asked Questions
Can I Cook Frozen Beef?
It’s best to thaw beef first. This ensures even cooking.
How Accurate Are the Cooking Times?
Cooking times are estimates. Your equipment and beef size can change the time.
What If I Don’t Have a Meat Thermometer?
Use the doneness indicators and estimated times provided.
Final Thoughts
Cooking beef doesn’t have to be hard. With the Beef Temperature Calculator, you get a helpful guide. Whether you’re new or experienced, these steps will lead you to a delicious meal.
Resources for Calculations
The cooking times and temperatures used in the calculator are based on standard culinary guidelines from reputable sources, including:
- United States Department of Agriculture (USDA) Guidelines
For safe minimum internal temperatures and cooking practices. - The Art of Cooking Meat by Peter Kaminsky
Provides detailed information on cooking times for various cuts and methods. - Professional Chef Textbooks
Such as “On Cooking” by Sarah R. Labensky, which offers comprehensive cooking techniques and times. - Culinary Institute of America (CIA) Resources
Known for their precise and tested cooking methods. - Beef Checkoff Program
Offers industry-standard guidelines on cooking beef cuts.
- Clean Skin Club Clean Towels XL
- Classic Homemade Lasagna Recipe
- Butternut Squash Lasagna with Ricotta and Marinara
- Classic Italian Lasagna Recipe
- 20 Delicious Lasagna Recipe Ideas You Need to Try
- How to Make a Cast Iron Pan Non Stick – Avoid THIS Huge Mistake!
- Secret Trick To Save Extra On Premium Knives
- Is Your Non-Stick Pan Poisoning You? Shocking Facts You Need to Know!
- Save Big on Chef Knives with This Secret Tool
- Costco Milk Price – How It Affects Your Budget
- 16 Little Known Cookware Deal Pages
- Circulon Cookware Deals – Save Big on Cookware
- Warehouse Sale Cookware Deals – Find Discounts of Up to 75% on Top Brands
- 64 Cookware Deals You Don’t Want to Miss!
- 7 Celebrity Chefs Cookware Collections You Need To Know
- Cast Iron Skillet Sale – This ‘Indestructible’ Pan Is a Must-Have!
- Cookware Match Calculator
- Cookware Deal – 13 Piece T-fal Ingenio Set Now 38% Off – Perfect for Small Kitchens & RVs!
- Gordon Ramsay Lasagna Recipe
- Easy Ground Beef Stroganoff Recipe